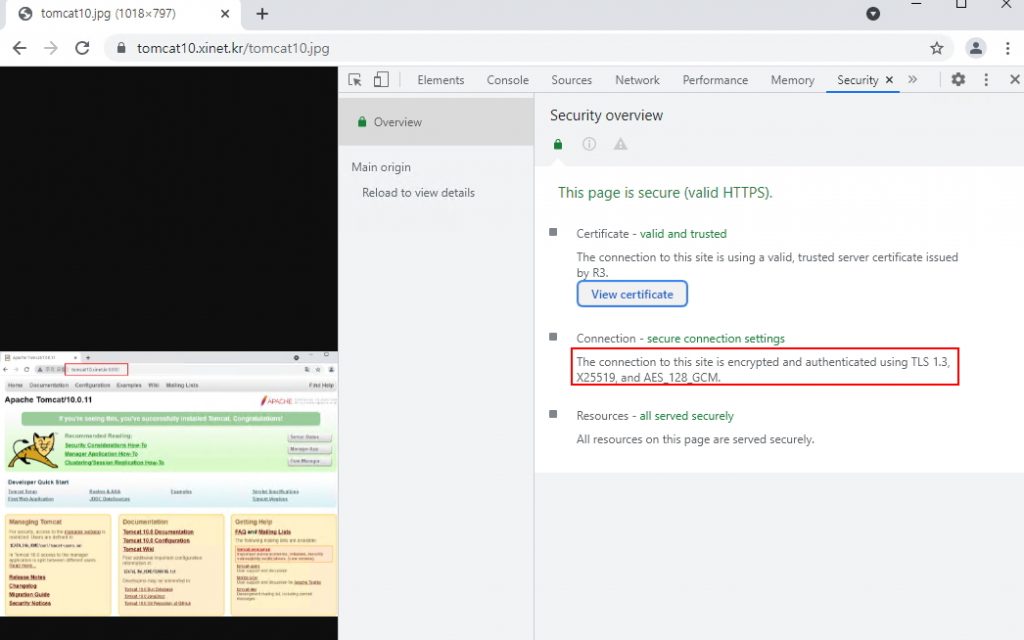
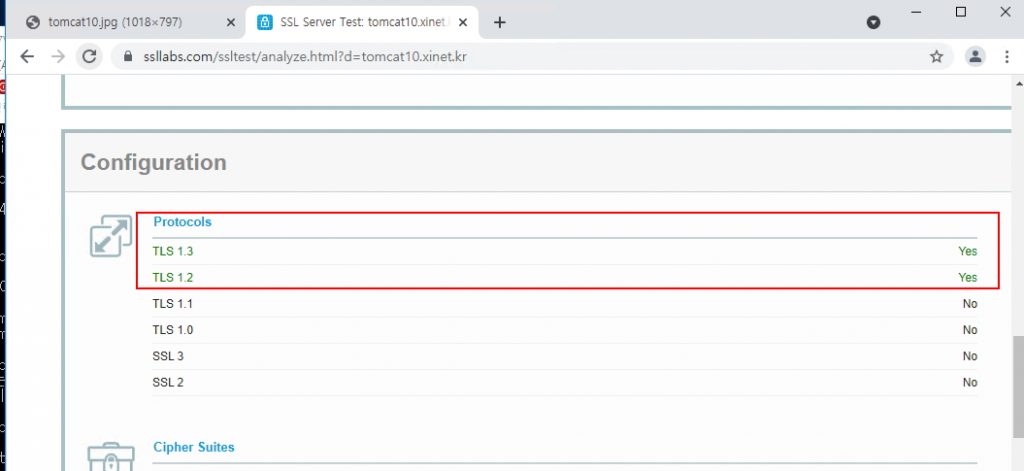
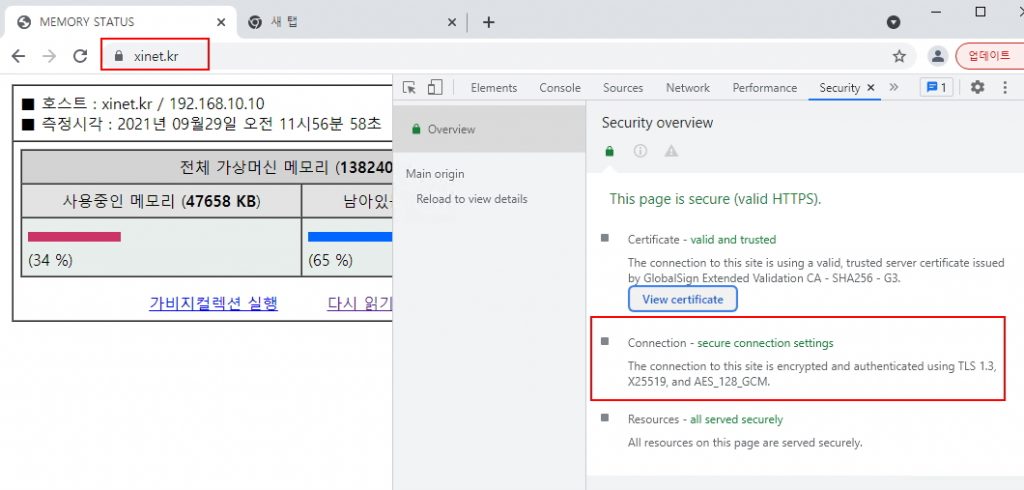
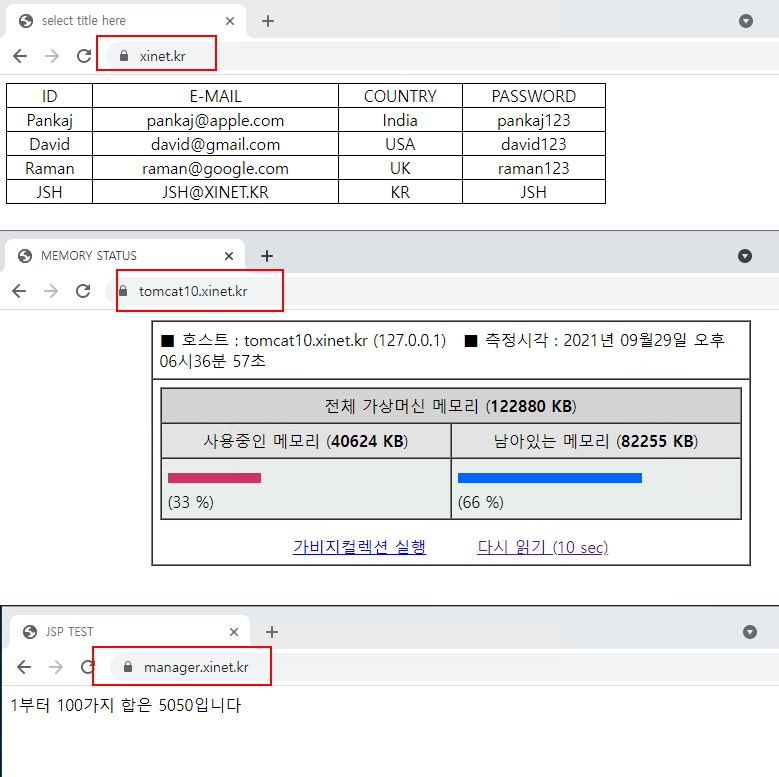
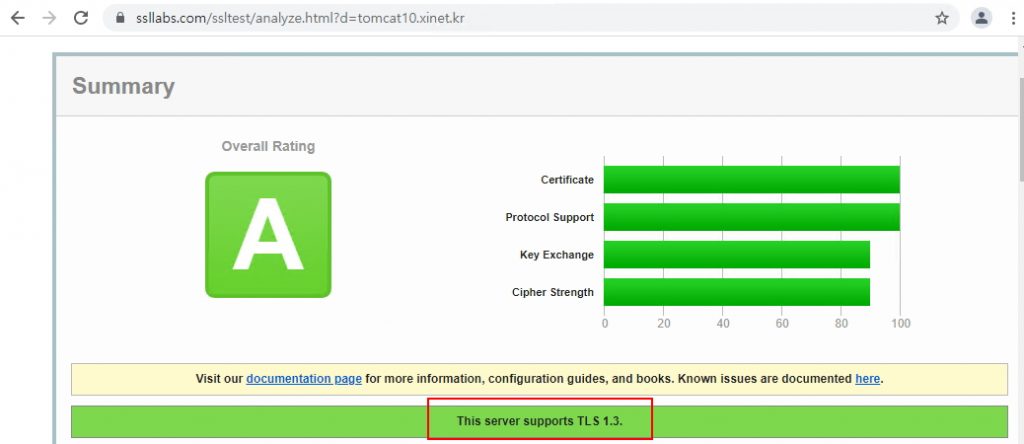
TOMCAT 10 버전에서는 HTTP2 , TLS 1.3 버전을 기본으로 제공한다
기존 8.X 버전에서는 HTTP2 프로토콜을 사용하려면 tomcat-native를 설치했어야 하는데 10 버전에서는 기본 제공한다
기존 8.x 버전 SSL 사용방법 -> https://xinet.kr/?p=1674
https://xinet.kr/?p=1674
환경 : Cenos 7.x
java : openjdk 11.x
tomcat : 10.0.11 -> tomcat 10.0.11 설치는 -> https://xinet.kr/?p=3267
tomcat 10 설치 java 11 , mariadb 연결 ( SSL , HTTP2 , TLS 1.3 )– certbot (무료인증서) – openssl 이용하는 방법
– openssl 인증서 작업 후 이용하는 방법
– keytool를 이용해서 이용하는 방법
위 3가지 방법 중 첫번째와 두번째 방법을 권장한다중요한것은 3개의 도메인이 모두 443 포트를 사용할수 있게 구성하는것 (하단 내용참고)
기본 java와 tomcat 설치되어 있다는 가정하에 진행 (설치는 위 링크에서 확인)
1. openssl을 이용하는 방법 ( 무료인증서 certbot 이용) 무료인증서 도메인 : tomcat10.xinet.kr / 홈경로 : /home/xinet_test/html
|
1 2 3 4 5 6 7 8 9 |
[root@localhost ~]# certbot certonly --webroot --webroot-path=/home/xinet_test/html/ -d tomcat10.xinet.kr [root@localhost ~]# ls -l /etc/letsencrypt/live/tomcat10.xinet.kr/ 합계 4 -rw-r--r-- 1 root root 692 9월 15 18:01 README lrwxrwxrwx 1 root root 41 9월 15 18:01 cert.pem -> ../../archive/tomcat10.xinet.kr/cert1.pem lrwxrwxrwx 1 root root 42 9월 15 18:01 chain.pem -> ../../archive/tomcat10.xinet.kr/chain1.pem lrwxrwxrwx 1 root root 46 9월 15 18:01 fullchain.pem -> ../../archive/tomcat10.xinet.kr/fullchain1.pem lrwxrwxrwx 1 root root 44 9월 15 18:01 privkey.pem -> ../../archive/tomcat10.xinet.kr/privkey1.pem |
2. 기존 tomcat 에서 HTTP2 를 사용하려면 tomcat-native 를 설치해서 이용했어야 하는데 이제 버전up 되면서 UpgradeProtocol className=”org.apache.coyote.http2.Http2Protocol 사용
기본 http11.Http11NioProtocol 보다 속도가 좀더 빠르다 -> 권장 http11.Http11Nio2Protocol 사용
|
1 2 3 4 5 6 7 8 9 10 11 12 13 14 15 16 17 |
[root@localhost ~]# vi /usr/local/tomcat/conf/server.xml <!-- PEM SSL Password NONE / HTTP/2 / http11.Http11Nio2Protocol 사용 --> <Connector port="8443" protocol="org.apache.coyote.http11.Http11Nio2Protocol" maxHttpHeaderSize="8192" maxThreads="150" enableLookups="false" acceptCount="100" connectionTimeout="20000" disableUploadTimeout="true" SSLEnabled="true" scheme="https"> <UpgradeProtocol className="org.apache.coyote.http2.Http2Protocol" /> <SSLHostConfig> <Certificate certificateKeyFile="/etc/letsencrypt/live/tomcat10.xinet.kr/privkey.pem" certificateFile="/etc/letsencrypt/live/tomcat10.xinet.kr/cert.pem" certificateChainFile="/etc/letsencrypt/live/tomcat10.xinet.kr/chain.pem" type="RSA" /> </SSLHostConfig> </Connector> |
20. tomcat 서비스 새시작 및 포트 확인 / 443 포트를 확인 할 수 있다
|
1 2 3 4 5 6 7 8 |
[root@localhost html]# catalina.sh stop [root@localhost html]# catalina.sh start [root@localhost ~]# netstat -anp | grep java tcp6 0 0 :::443 :::* LISTEN 12468/java tcp6 0 0 127.0.0.1:8005 :::* LISTEN 12468/java tcp6 0 0 :::80 :::* LISTEN 12468/java |
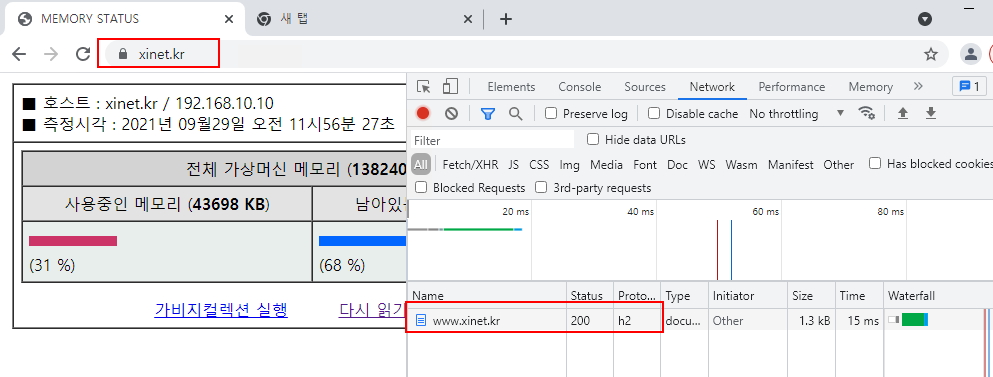
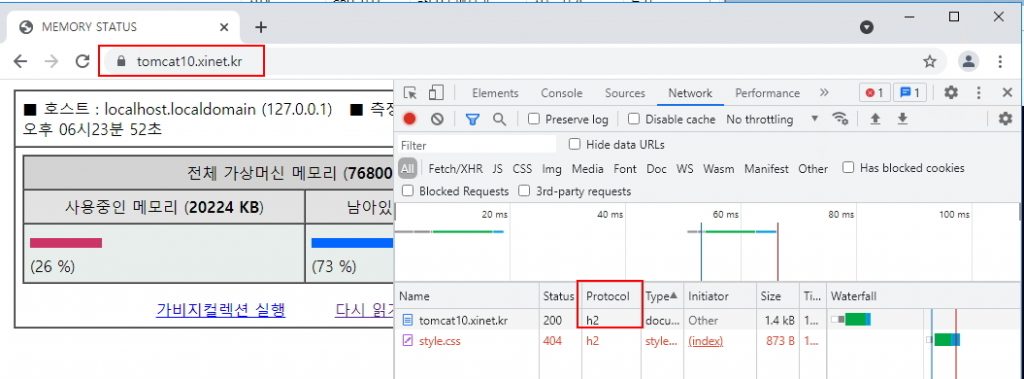
21. 웹페이지 확인 / https 통신이 되었으며 프로토콜도 http2 / h2 프로토콜을 사용함
3. 만약 openssl을 이용하여 만든 인증서를 적용하려면 다음과 같이 적용하면 된다
|
1 2 3 4 5 6 7 8 9 10 11 12 13 14 15 16 17 18 19 20 21 22 23 24 25 26 27 28 29 30 31 32 33 |
[root@localhost ~]# mkdir /usr/local/tomcat/conf/ssl [root@localhost ~]# cd /usr/local/tomcat/conf/ssl ### OPENSSL 이용하여 KEY 파일 생성 [root@localhost ssl]# openssl genrsa -des3 -out xinet.kr.key 2048 Generating RSA private key, 2048 bit long modulus ..................................+++ ............................................................................................+++ e is 65537 (0x10001) Enter pass phrase for www.xinet.kr: Verifying - Enter pass phrase for jsp4.xinet.kr: ### CSR 파일 생성 [root@localhost ssl]# openssl req -new -key www.xinet.kr.key -out www.xinet.kr.csr Enter pass phrase for www.xinet.kr.key: You are about to be asked to enter information that will be incorporated into your certificate request. What you are about to enter is what is called a Distinguished Name or a DN. There are quite a few fields but you can leave some blank For some fields there will be a default value, If you enter '.', the field will be left blank. ----- Country Name (2 letter code) [XX]:KR State or Province Name (full name) []:Gyeonggi-do Locality Name (eg, city) [Default City]:Gwangmyeong-si Organization Name (eg, company) [Default Company Ltd]:xinet Organizational Unit Name (eg, section) []:SE Common Name (eg, your name or your server's hostname) []:www.xinet.kr Email Address []: xinet@xinet.kr Please enter the following 'extra' attributes to be sent with your certificate request A challenge password []: |
기본 key 파일을 그대로 사용하면 암호 입력을 해야 하기 때문에 key 파일에 암호없이 사용할수 있게 openssl 명령어로 작업
|
1 2 3 4 5 6 7 8 9 10 11 12 13 14 15 |
[root@localhost html]# cd /usr/local/tomcat/conf/ssl/ [root@localhost ssl]# ll -rw-r--r-- 1 root root 1280 7월 7 13:22 CA_GLOBALSIGN_ROOT_CA.crt -rw-r--r-- 1 root root 3182 7월 7 13:22 ChainFile_ChainBundle.crt -rw-r--r-- 1 root root 2954 7월 7 13:22 xinet.kr.crt -rw-r--r-- 1 root root 1679 7월 7 13:22 xinet.kr.key ### 개인 key 파일 복사 [root@localhost ssl]# cp -a xinet.kr.key xinet.kr.key.ssl [root@localhost ssl]# openssl rsa -in xinet.kr.key.ssl -out xinet.kr.key Enter pass phrase for xinet.kr.key.ssl: writing RSA key |
CSR 파일이 생성되었으면 인증서 업체에 CSR 정보를 보내어 인증서 파일을 받으면 된다
보통 인증서, 체인인증서, ROOT 인증서를 받는다
개인인증서 : xinet.kr.crt
체인 인증서 : ChainFile_ChainBundle.crt
도메인 : www.xinet.kr / 홈경로 : /home/xinet_test2/html / SSL 설정 뿐 아니라 가상호스트도 설정해줘야 한다
|
1 2 3 4 5 6 7 8 9 10 11 12 13 14 15 16 17 18 19 20 21 22 23 24 |
<!-- PEM SSL Password True / HTTP/2 / --> <Connector port="443" protocol="org.apache.coyote.http11.Http11Nio2Protocol" maxHttpHeaderSize="8192" maxThreads="150" enableLookups="false" acceptCount="100" connectionTimeout="20000" disableUploadTimeout="true" SSLEnabled="true" scheme="https"> <UpgradeProtocol className="org.apache.coyote.http2.Http2Protocol" /> <SSLHostConfig> <Certificate certificateKeyFile="/usr/local/tomcat/conf/ssl/xinet.kr.key" certificateFile="/usr/local/tomcat/conf/ssl/xinet.kr.crt" certificateChainFile="/usr/local/tomcat/conf/ssl/ChainFile_ChainBundle.crt" certificateKeyPassword="" type="RSA" /> </SSLHostConfig> </Connector> <Host name="www.xinet.kr" appBase="/home/xinet_test2/html" unpackWARs="true" autoDeploy="true"> <Valve className="org.apache.catalina.valves.AccessLogValve" directory="logs" prefix="xinet.kr_access_log" suffix=".txt" pattern="%h %l %u %t %r %s %b" /> <Context path="" docBase="/home/xinet_test2/html/" debug="0" reloadable="true"/> <Alias>xinet.kr</Alias> </Host> |
Certificate certificateKeyFile : 인증서 개인 key파일
certificateFile : 인증서 cert 파일
certificateChainFile : chain 인증서 파일
5. keytool를 이용하여 jks 형태로 만들어서 사용할때는 아래와 같이 구성
|
1 2 3 4 5 6 7 8 9 10 11 12 13 14 15 16 17 18 19 20 21 22 |
[root@localhost ~]# cd /usr/local/tomcat/conf/ssl [root@localhost ssl]# keytool -genkey -keyalg RSA -sigalg SHA256withRSA -alias xinet -keysize 2048 -keystore www.xinet.kr.jks 키 저장소 비밀번호 입력: 123456 새 비밀번호 다시 입력: 이름과 성을 입력하십시오. [Unknown]: www.xinet.kr 조직 단위 이름을 입력하십시오. [Unknown]: se 조직 이름을 입력하십시오. [Unknown]: xinet 구/군/시 이름을 입력하십시오? [Unknown]: Gwangmyeong-si 시/도 이름을 입력하십시오. [Unknown]: Gyeonggi-do 이 조직의 두 자리 국가 코드를 입력하십시오. [Unknown]: KR CN=jsp2.xinet.kr, OU=se, O=xinet, L=Gwangmyeong-si, ST=Gyeonggi-do, C=KR이(가) 맞습니까? [아니오]: Y <jsp2>에 대한 키 비밀번호를 입력하십시오. (키 저장소 비밀번호와 동일한 경우 Enter 키를 누름): |
-keyalg : 키알고리즘으로 RSA 을 지정합니다
-sigalg : 서명알고리즘으로 SHA256 을 지정합니다.
-alias : 대체 이름으로 영문 단어를 지정하며, 특수문자등은 사용하지 않아야 합니다.
-keystore : 개인키 파일
### CSR 생성
|
1 2 3 |
[root@localhost ssl]# keytool -certreq -alias xinet -keyalg RSA -sigalg SHA256withRSA -file www.xinet.kr.csr -keystore www.xinet.kr.jks 키 저장소 비밀번호 입력:ㅂㅈㄷㄱ1234%^ |
-keyalg : 키알고리즘으로 RSA 을 지정합니다
-sigalg : 서명알고리즘으로 SHA256 을 지정합니다.
-alias : 대체 이름으로 영문 단어를 지정하며, 특수문자등은 사용하지 않아야 합니다.
-keystore : 개인키 파일
-file : CSR 저장할 파일
### 서버 인증서JKS 포맷 조합
|
1 2 3 4 |
keytool -import -trustcacerts -alias AddTrustExternalCARoot -file AddTrustExternalCARoot.crt -keystore www.xinet.kr.jks keytool -import -trustcacerts -alias COMODORSAAddTrustCA -file COMODORSAAddTrustCA.crt -keystore www.xinet.kr.jks keytool -import -trustcacerts -alias COMODORSACA -file COMODORSADomainValidationSecureServerCA.crt -keystore www.xinet.kr.jks keytool -import -trustcacerts -alias xinet -file www.xinet.kr.crt -keystore www.xinet.kr.jks |
ROOT 인증서 -> 체인인증서 -> 개인인증서 순으로 jks으로 포맷 조합을 하면 된다.
tomcat server .xml 파일을 열어서
|
1 2 3 4 5 6 7 8 9 10 11 12 |
<!-- JKS SSL Password True / HTTP/2 / https-openssl-nio protocol --> <Connector port="8443" protocol="org.apache.coyote.http11.Http11NioProtocol" maxHttpHeaderSize="8192" maxThreads="150" enableLookups="false" acceptCount="100" connectionTimeout="20000" disableUploadTimeout="true" SSLEnabled="true" scheme="https"> <UpgradeProtocol className="org.apache.coyote.http2.Http2Protocol" /> <SSLHostConfig> <Certificate certificateKeystoreFile="/usr/local/tomcat/conf/ssl/tomcat10.xinet.kr.jks" certificateKeystorePassword="qwer1234%^" type="RSA" /> </SSLHostConfig> </Connector> |
웹 페이지에 정상적으로 출력 확인
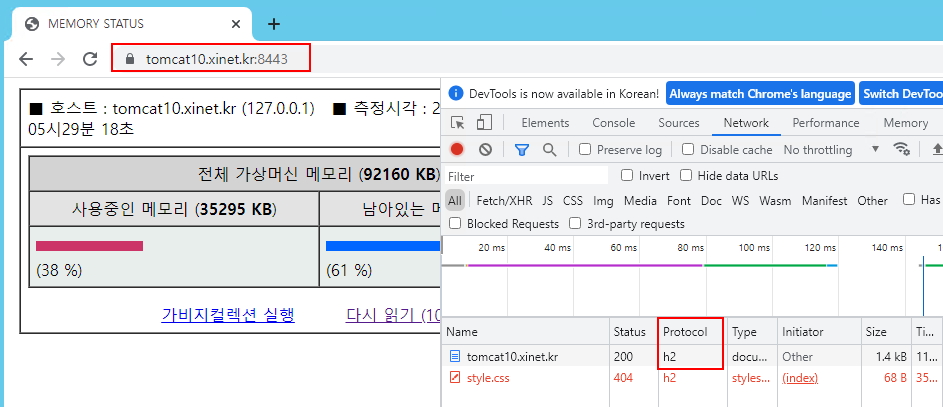
다만 jks 형태보다는 openssl 형태를 권장한다
* 중요한것은 내가 이용하는 tomcat 서버에 SSL 사이트가 3개이상 존재하는데 모두 동일하게 443 포트를 사용하려고 한다
그럼 아래와 같이 설정을 하면 된다 ( tomcat ssl multi )
아래 양식을 잘 지켜야지 3개의 도메인이 정상적으로 올라오게 된다 /
|
1 2 3 4 5 6 7 8 9 10 11 12 13 14 15 16 17 18 19 20 21 22 23 24 25 26 27 28 29 30 31 32 33 34 35 36 37 38 39 40 41 |
[root@localhost ~]# vi /usr/local/tomcat/conf/server.xml <Connector port="443" protocol="org.apache.coyote.http11.Http11Nio2Protocol" maxHttpHeaderSize="8192" maxThreads="150" enableLookups="false" acceptCount="100" connectionTimeout="20000" disableUploadTimeout="true" SSLEnabled="true" scheme="https" defaultSSLHostConfigName="www.xinet.kr"> <UpgradeProtocol className="org.apache.coyote.http2.Http2Protocol" /> <SSLHostConfig hostName="www.xinet.kr"> <Certificate certificateKeyFile="/usr/local/tomcat/conf/ssl/xinet.kr.key" certificateFile="/usr/local/tomcat/conf/ssl/xinet.kr.crt" certificateChainFile="/usr/local/tomcat/conf/ssl/ChainFile_ChainBundle.crt" certificateKeyPassword="" type="RSA" /> </SSLHostConfig> <SSLHostConfig hostName="tomcat10.xinet.kr"> <Certificate certificateKeyFile="/etc/letsencrypt/live/tomcat10.xinet.kr/privkey.pem" certificateFile="/etc/letsencrypt/live/tomcat10.xinet.kr/cert.pem" certificateChainFile="/etc/letsencrypt/live/tomcat10.xinet.kr/chain.pem" certificateKeyPassword="" type="RSA" /> </SSLHostConfig> <SSLHostConfig hostName="manager.xinet.kr"> <Certificate certificateKeyFile="/etc/letsencrypt/live/manager.xinet.kr/privkey.pem" certificateFile="/etc/letsencrypt/live/manager.xinet.kr/cert.pem" certificateChainFile="/etc/letsencrypt/live/manager.xinet.kr/chain.pem" certificateKeyPassword="" type="RSA" /> </SSLHostConfig> </Connector> |
혹시 모르니 가상호스트 부분도 참고할수 있게
|
1 2 3 4 5 6 7 8 9 10 11 12 13 14 15 16 17 18 19 20 21 22 23 24 |
<Host name="tomcat10.xinet.kr" appBase="/home/xinet_test/html" unpackWARs="true" autoDeploy="true"> <Valve className="org.apache.catalina.valves.AccessLogValve" directory="logs" prefix="tomcat10.xinet.kr_access_log" suffix=".txt" pattern="%h %l %u %t %r %s %b" /> <Context path="" docBase="/home/xinet_test/html/" debug="0" reloadable="true"/> </Host> <Host name="www.xinet.kr" appBase="/home/xinet_test2/html" unpackWARs="true" autoDeploy="true"> <Valve className="org.apache.catalina.valves.AccessLogValve" directory="logs" prefix="tomcat10.xinet.kr_access_log" suffix=".txt" pattern="%h %l %u %t %r %s %b" /> <Context path="" docBase="/home/xinet_test2/html/" debug="0" reloadable="true"/> <Alias>xinet.kr</Alias> </Host> <Host name="manager.xinet.kr" appBase="/home/manager.xinet.kr/html" unpackWARs="true" autoDeploy="true"> <Valve className="org.apache.catalina.valves.AccessLogValve" directory="logs" prefix="manager.xinet.kr_access_log" suffix=".txt" pattern="%h %l %u %t %r %s %b" /> <Context path="" docBase="/home/manager.xinet.kr/html/" debug="0" reloadable="true"/> </Host> |
