O/S : Centos 7.x / 64bit
tomcat : 10.0.11
java : openjdk version “11.0.12”
DBMS : mariadb 10.x
1. 먼저 서버에 java 를 설치를 진행 java는 openjdk를 사용 yum 이용하여 설치 진행
|
1 |
[root@localhost ~]# yum -y install java-11-openjdk java-11-openjdk-devel java-11-openjdk-headless |
2. 설치가 완료되었으면 java 버전을 확인해 본다
|
1 2 3 4 5 6 7 |
[root@localhost ~]# java --version openjdk 11.0.12 2021-07-20 LTS OpenJDK Runtime Environment 18.9 (build 11.0.12+7-LTS) OpenJDK 64-Bit Server VM 18.9 (build 11.0.12+7-LTS, mixed mode, sharing) [root@localhost ~]# javac --version javac 11.0.12 |
3. 기본 설치 경로는 다음과 같다
|
1 2 3 4 5 6 7 8 9 10 11 |
[root@localhost ~]# rpm -ql java-11-openjdk /usr/lib/jvm/java-11-openjdk-11.0.12.0.7-0.el7_9.x86_64/lib/libawt_xawt.so /usr/lib/jvm/java-11-openjdk-11.0.12.0.7-0.el7_9.x86_64/lib/libjawt.so /usr/lib/jvm/java-11-openjdk-11.0.12.0.7-0.el7_9.x86_64/lib/libsplashscreen.so /usr/share/icons/hicolor/16x16/apps/java-11-openjdk.png /usr/share/icons/hicolor/24x24/apps/java-11-openjdk.png /usr/share/icons/hicolor/32x32/apps/java-11-openjdk.png /usr/share/icons/hicolor/48x48/apps/java-11-openjdk.png ### 실제경로 /usr/lib/jvm/java-11-openjdk-11.0.12.0.7-0.el7_9.x86_64/ |
4. tomcat 다운로드 및 압축 해제
|
1 2 3 4 5 |
[root@localhost ~]# wget https://dlcdn.apache.org/tomcat/tomcat-10/v10.0.11/bin/apache-tomcat-10.0.11.tar.gz [root@localhost ~]# tar xvfz apache-tomcat-10.0.11.tar.gz [root@localhost ~]# mv apache-tomcat-10.0.11 /usr/local/tomcat |
5. path 경로 설정
|
1 2 3 4 5 |
[root@localhost ~]# vi /etc/profile export JAVA_HOME=/usr/lib/jvm/java-11-openjdk-11.0.12.0.7-0.el7_9.x86_64 export CATALINA_HOME=/usr/local/tomcat PATH=$PATH:$JAVA_HOME/bin:$CATALINA_HOME/bin |
6. 적용
|
1 |
[root@localhost ~]# source /etc/profile |
7. 기본 상태에서 tomcat 시작
|
1 2 3 4 5 6 7 8 |
[root@localhost ~]# catalina.sh start Using CATALINA_BASE: /usr/local/tomcat Using CATALINA_HOME: /usr/local/tomcat Using CATALINA_TMPDIR: /usr/local/tomcat/temp Using JRE_HOME: /usr Using CLASSPATH: /usr/local/tomcat/bin/bootstrap.jar:/usr/local/tomcat/bin/tomcat-juli.jar Using CATALINA_OPTS: Tomcat started. |
8. 프로세서 확인 및 포트 확인
|
1 2 3 4 5 6 7 8 9 |
[root@localhost ~]# ps -ef | grep java root 12037 1 99 17:39 pts/0 00:00:15 /usr/bin/java -Djava.util.logging.config.file=/usr/local/tomcat/conf/logging.properties -Djava.util.logging.manager=org.apache.juli.ClassLoaderLogManager -Djdk.tls.ephemeralDHKeySize=2048 -Djava.protocol.handler.pkgs=org.apache.catalina.webresources -Dorg.apache.catalina.security.SecurityListener.UMASK=0027 -Dignore.endorsed.dirs= -classpath /usr/local/tomcat/bin/bootstrap.jar:/usr/local/tomcat/bin/tomcat-juli.jar -Dcatalina.base=/usr/local/tomcat -Dcatalina.home=/usr/local/tomcat -Djava.io.tmpdir=/usr/local/tomcat/temp org.apache.catalina.startup.Bootstrap start root 12064 11212 0 17:39 pts/0 00:00:00 grep --color=auto java [root@localhost ~]# netstat -anp | grep java tcp6 0 0 127.0.0.1:8005 :::* LISTEN 12037/java tcp6 0 0 :::8080 :::* LISTEN 12037/java unix 2 [ ] STREAM CONNECTED 242606 12037/java unix 2 [ ] STREAM CONNECTED 242599 12037/java |
8005 포트 : 하나의 인스턴스에 사용하는 port
8080 포트 : 실제 tomcat이 사용하는 웹포트
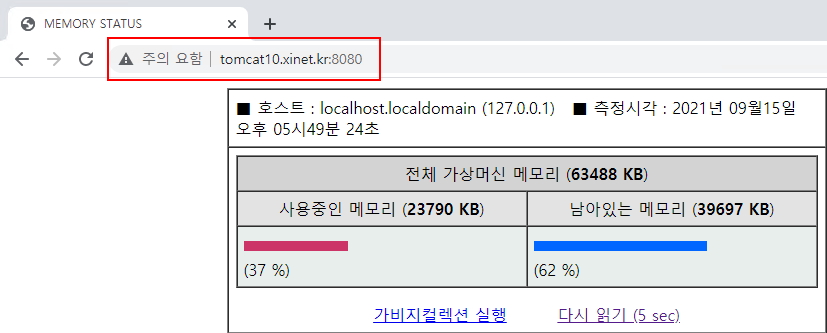
9. 웹페이지 확인 기본 http://아이피:8080
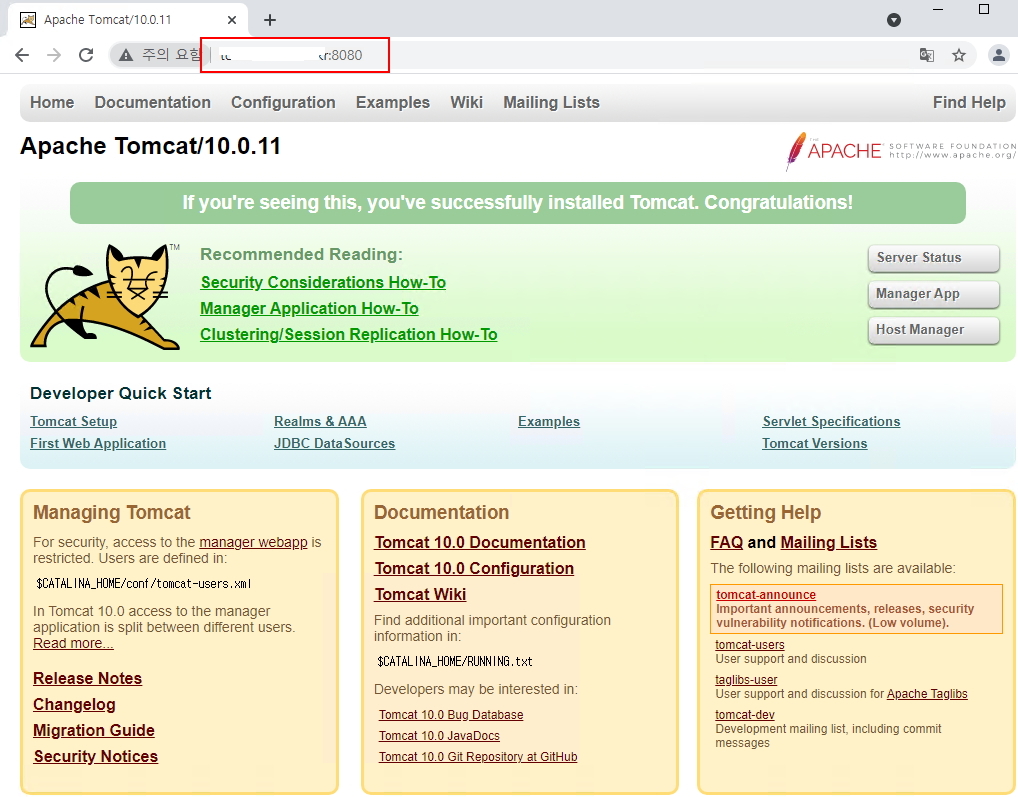
10. 이제 정상적으로 tomcat 서비스 되므로 가상호스트를 설정해보자
가상 호스트 주소 : tomcat10.xinet.kr / 기본 홈경로 : /home/xinet_test/html
설정에 앞서 server.xml 파일을 백옵해 놓자 / 항상 원본 파일은 백옵 필수
|
1 2 3 4 5 6 7 8 9 10 11 |
[root@localhost ~]# cp -a /usr/local/tomcat/conf/server.xml /usr/local/tomcat/conf/server.xml.ori [root@localhost ~]# vi /usr/local/tomcat/conf/server.xml <Host name="tomcat10.xinet.kr" appBase="/home/xinet_test/html" unpackWARs="true" autoDeploy="true"> <Valve className="org.apache.catalina.valves.AccessLogValve" directory="logs" prefix="tomcat10.xinet.kr_access_log" suffix=".txt" pattern="%h %l %u %t %r %s %b" /> <Context path="" docBase="/home/xinet_test/html/" debug="0" reloadable="true"/> </Host> |
11. tocmat 재시작 후
|
1 2 3 |
[root@localhost ~]# catalina.sh stop [root@localhost ~]# catalina.sh start |
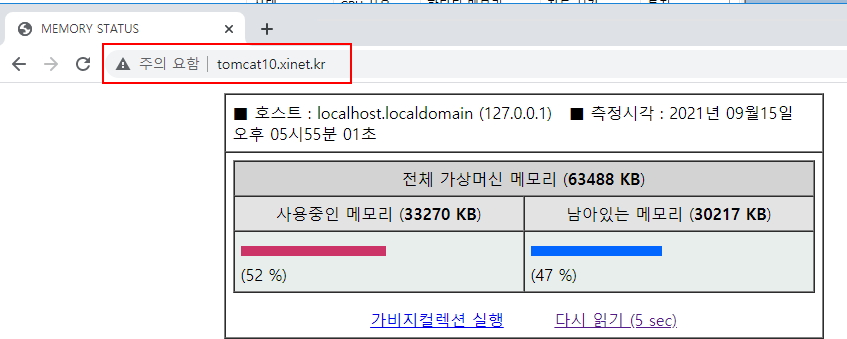
12. 웹페이지에서 jsp 파일을 호출하기 위해서 sample jsp 파일을 다운로드 후 웹페지에서 확인 ( 샘플 memory 확인 jsp 파일)
|
1 2 3 4 5 |
[root@localhost ~]# cd /home/xinet_test/html/ [root@localhost html]# wget xinet.kr/data/source/memory.jsp [root@localhost html]# mv memory.jsp index.jsp |
14. 만약 현재 아이피주소뒤에 8080을 사용하는데 8080 포트가 아닌 80포트를 사용 할 경우 server.xml 파일 수정
|
1 2 3 4 5 6 7 8 9 10 |
[root@localhost html]# vi /usr/local/tomcat/conf/server.xml <Connector port="8080" protocol="HTTP/1.1" connectionTimeout="20000" redirectPort="8443" /> <Connector port="80" protocol="HTTP/1.1" connectionTimeout="20000" redirectPort="8443" /> |
15. tomcat 서비스 재시작 및 포트 확인
|
1 2 3 4 5 6 7 8 9 10 |
[root@localhost html]# catalina.sh stop [root@localhost html]# catalina.sh start ### 포트확인 [root@localhost html]# netstat -anp | grep java tcp6 0 0 :::80 :::* LISTEN 12306/java unix 2 [ ] STREAM CONNECTED 249119 12306/java unix 2 [ ] STREAM CONNECTED 241646 12306/java |
17. tomcat 10 에서 ssl을 셋팅해서 사용해 보자 기본 certbot을 이용하여 무료 인증서 설치
|
1 |
[root@localhost ~]# yum -y install certbot |
18. 무료인증서 도메인 : tomcat10.xinet.kr / 홈경로 : /home/xinet_test/html
|
1 2 3 4 5 6 7 8 9 |
[root@localhost ~]# certbot certonly --webroot --webroot-path=/home/xinet_test/html/ -d tomcat10.xinet.kr [root@localhost ~]# ls -l /etc/letsencrypt/live/tomcat10.xinet.kr/ 합계 4 -rw-r--r-- 1 root root 692 9월 15 18:01 README lrwxrwxrwx 1 root root 41 9월 15 18:01 cert.pem -> ../../archive/tomcat10.xinet.kr/cert1.pem lrwxrwxrwx 1 root root 42 9월 15 18:01 chain.pem -> ../../archive/tomcat10.xinet.kr/chain1.pem lrwxrwxrwx 1 root root 46 9월 15 18:01 fullchain.pem -> ../../archive/tomcat10.xinet.kr/fullchain1.pem lrwxrwxrwx 1 root root 44 9월 15 18:01 privkey.pem -> ../../archive/tomcat10.xinet.kr/privkey1.pem |
19. 기존 tomcat 에서 HTTP2 를 사용하려면 tomcat-native 를 설치해서 이용했어야 하는데 이제 버전up 되면서 기본 https-openssl-nio protocal 사용
|
1 2 3 4 5 6 7 8 9 10 11 12 13 14 15 16 17 |
[root@localhost ~]# vi /usr/local/tomcat/conf/server.xml <!-- PEM SSL Password NONE / HTTP/2 / https-openssl-nio protocol 사용 (tomcat native 상관없이 동작됨 --> <Connector port="8443" protocol="org.apache.coyote.http11.Http11NioProtocol" maxHttpHeaderSize="8192" maxThreads="150" enableLookups="false" acceptCount="100" connectionTimeout="20000" disableUploadTimeout="true" SSLEnabled="true" scheme="https"> <UpgradeProtocol className="org.apache.coyote.http2.Http2Protocol" /> <SSLHostConfig> <Certificate certificateKeyFile="/etc/letsencrypt/live/tomcat10.xinet.kr/privkey.pem" certificateFile="/etc/letsencrypt/live/tomcat10.xinet.kr/cert.pem" certificateChainFile="/etc/letsencrypt/live/tomcat10.xinet.kr/chain.pem" type="RSA" /> </SSLHostConfig> </Connector> |
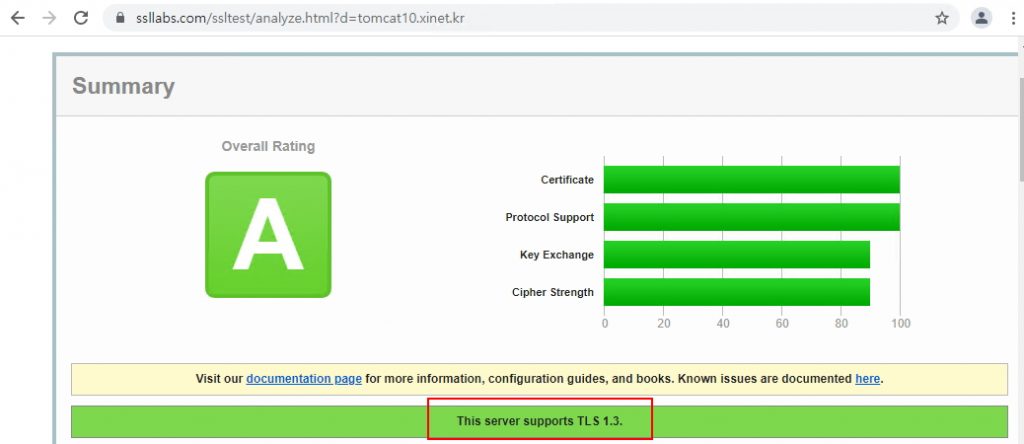
20. tomcat 서비스 새시작 및 포트 확인 / 443 포트를 확인 할 수 있다
|
1 2 3 4 5 6 7 8 |
[root@localhost html]# catalina.sh stop [root@localhost html]# catalina.sh start [root@localhost ~]# netstat -anp | grep java tcp6 0 0 :::443 :::* LISTEN 12468/java tcp6 0 0 127.0.0.1:8005 :::* LISTEN 12468/java tcp6 0 0 :::80 :::* LISTEN 12468/java |
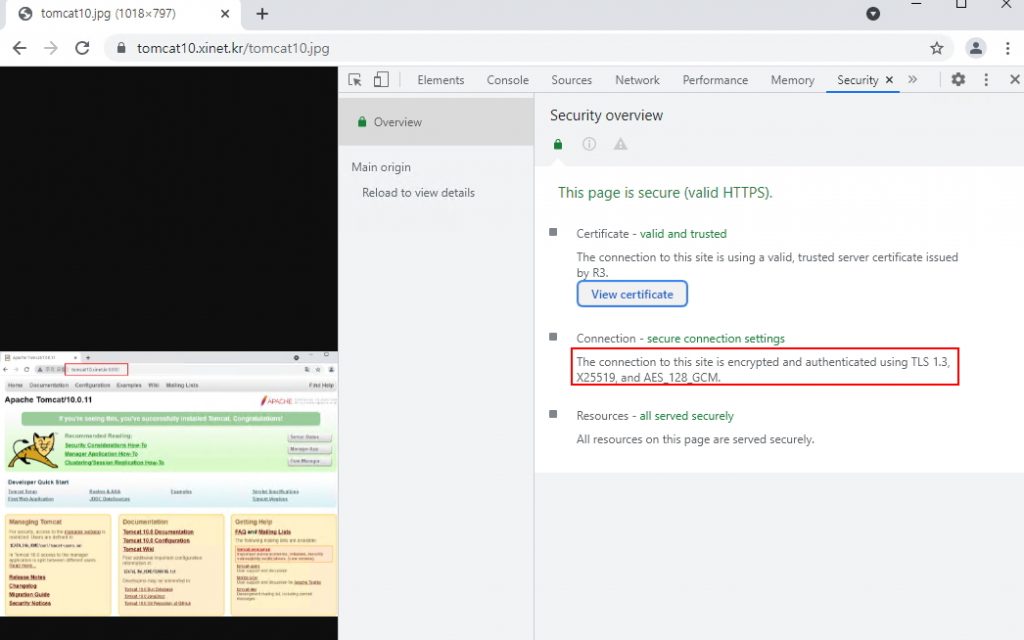
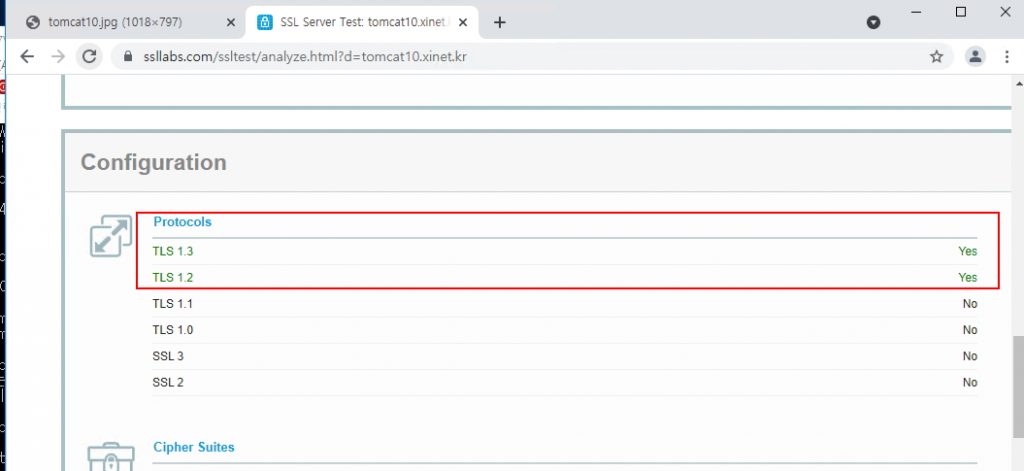
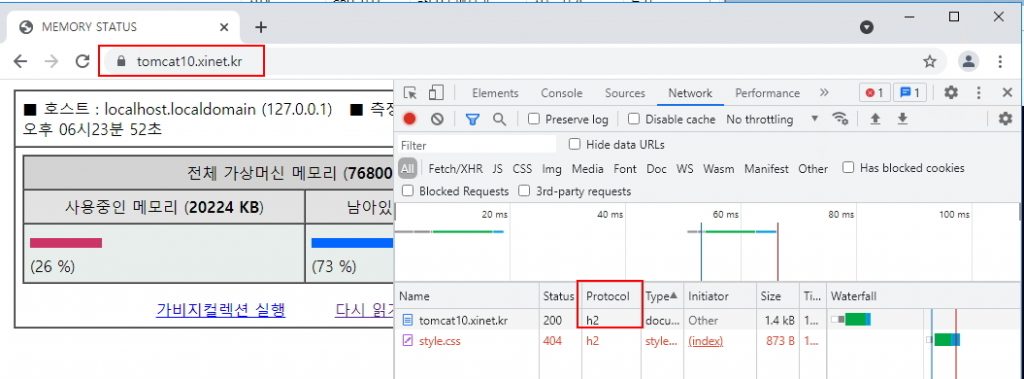
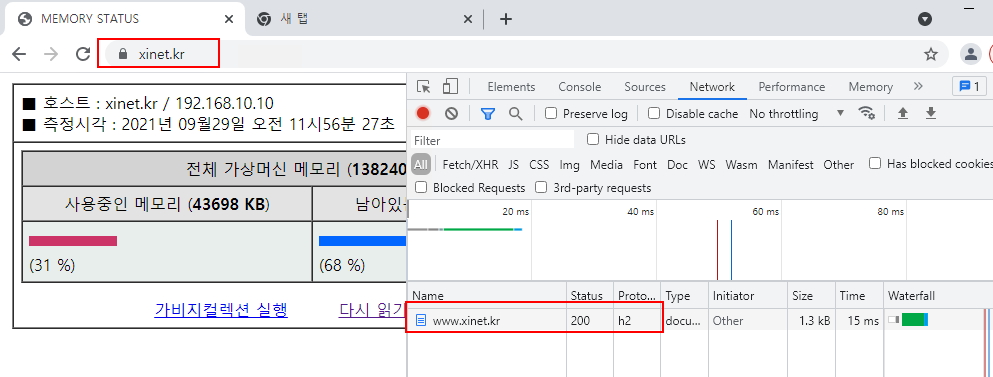
21. 웹페이지 확인 / https 통신이 되었으며 프로토콜도 http2 / h2 프로토콜을 사용함
22. 만약 openssl을 이용하여 만든 인증서를 적용하려면 다음과 같이 적용하면 된다 / SSL만 적용하는게 아니라 가상호스트도 같이 설정해줘야 한다
|
1 2 3 4 5 6 7 8 9 10 11 12 13 14 15 16 17 18 19 20 21 22 23 24 25 26 27 28 29 30 31 32 33 |
[root@localhost ~]# mkdir /usr/local/tomcat/conf/ssl [root@localhost ~]# cd /usr/local/tomcat/conf/ssl ### OPENSSL 이용하여 KEY 파일 생성 [root@localhost ssl]# openssl genrsa -des3 -out xinet.kr.key 2048 Generating RSA private key, 2048 bit long modulus ..................................+++ ............................................................................................+++ e is 65537 (0x10001) Enter pass phrase for www.xinet.kr: Verifying - Enter pass phrase for jsp4.xinet.kr: ### CSR 파일 생성 [root@localhost ssl]# openssl req -new -key www.xinet.kr.key -out www.xinet.kr.csr Enter pass phrase for www.xinet.kr.key: You are about to be asked to enter information that will be incorporated into your certificate request. What you are about to enter is what is called a Distinguished Name or a DN. There are quite a few fields but you can leave some blank For some fields there will be a default value, If you enter '.', the field will be left blank. ----- Country Name (2 letter code) [XX]:KR State or Province Name (full name) []:Gyeonggi-do Locality Name (eg, city) [Default City]:Gwangmyeong-si Organization Name (eg, company) [Default Company Ltd]:xinet Organizational Unit Name (eg, section) []:SE Common Name (eg, your name or your server's hostname) []:www.xinet.kr Email Address []: xinet@xinet.kr Please enter the following 'extra' attributes to be sent with your certificate request A challenge password []: |
기본 key 파일을 그대로 사용하면 암호 입력을 해야 하기 때문에 key 파일에 암호없이 사용할수 있게 openssl 명령어로 작업
|
1 2 3 4 5 6 7 8 9 10 11 12 13 14 15 |
[root@localhost html]# cd /usr/local/tomcat/conf/ssl/ [root@localhost ssl]# ll -rw-r--r-- 1 root root 1280 7월 7 13:22 CA_GLOBALSIGN_ROOT_CA.crt -rw-r--r-- 1 root root 3182 7월 7 13:22 ChainFile_ChainBundle.crt -rw-r--r-- 1 root root 2954 7월 7 13:22 xinet.kr.crt -rw-r--r-- 1 root root 1679 7월 7 13:22 xinet.kr.key ### 개인 key 파일 복사 [root@localhost ssl]# cp -a xinet.kr.key xinet.kr.key.ssl [root@localhost ssl]# openssl rsa -in xinet.kr.key.ssl -out xinet.kr.key Enter pass phrase for xinet.kr.key.ssl: writing RSA key |
CSR 파일이 생성되었으면 인증서 업체에 CSR 정보를 보내어 인증서 파일을 받으면 된다
보통 인증서, 체인인증서, ROOT 인증서를 받는다
개인인증서 : xinet.kr.crt
체인 인증서 : ChainFile_ChainBundle.crt
도메인 : xinet.kr / 홈경로 : /home/xinet_test2/html
|
1 2 3 4 5 6 7 8 9 10 11 12 13 14 15 16 17 18 19 20 21 22 23 24 |
<!-- PEM SSL Password True / HTTP/2 / --> <Connector port="443" protocol="org.apache.coyote.http11.Http11NioProtocol" maxHttpHeaderSize="8192" maxThreads="150" enableLookups="false" acceptCount="100" connectionTimeout="20000" disableUploadTimeout="true" SSLEnabled="true" scheme="https"> <UpgradeProtocol className="org.apache.coyote.http2.Http2Protocol" /> <SSLHostConfig> <Certificate certificateKeyFile="/usr/local/tomcat/conf/ssl/xinet.kr.key" certificateFile="/usr/local/tomcat/conf/ssl/xinet.kr.crt" certificateChainFile="/usr/local/tomcat/conf/ssl/ChainFile_ChainBundle.crt" certificateKeyPassword="" type="RSA" /> </SSLHostConfig> </Connector> <Host name="www.xinet.kr" appBase="/home/xinet_test2/html" unpackWARs="true" autoDeploy="true"> <Valve className="org.apache.catalina.valves.AccessLogValve" directory="logs" prefix="xinet.kr_access_log" suffix=".txt" pattern="%h %l %u %t %r %s %b" /> <Context path="" docBase="/home/xinet_test2/html/" debug="0" reloadable="true"/> <Alias>xinet.kr</Alias> </Host> |
Certificate certificateKeyFile : 인증서 개인 key파일
certificateFile : 인증서 cert 파일
certificateChainFile : chain 인증서 파일
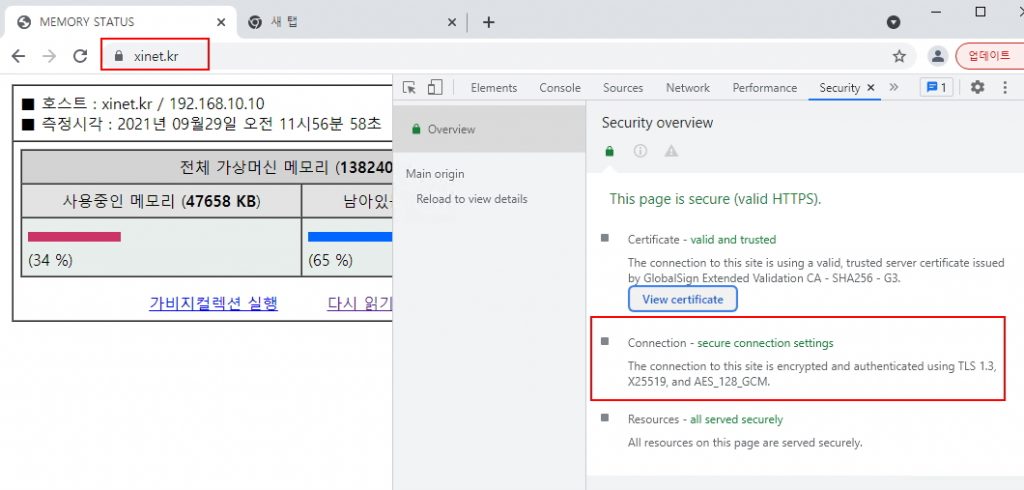
23. tomcat 재시작 및 웹페이지 확인
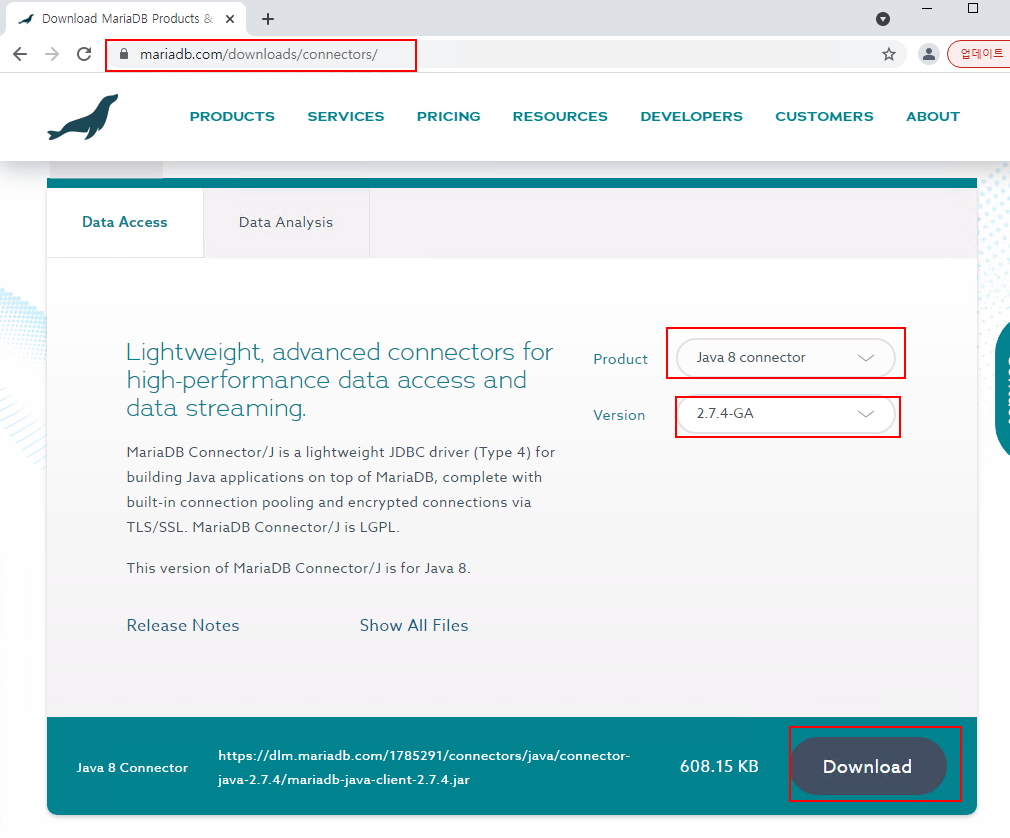
24. 여기까지는 tomcat의 설정부분인데 여기서 mariadb를 연결해서 사용하려면 mysql-connector 또는 mariadb-java-client 설치? 설정해 줘야 한다
현 테스트 서버 : mariadb 10.x
다운로드 주소 : https://mariadb.com/downloads/#connectors
|
1 2 3 4 5 |
[root@localhost ~]# wget https://dlm.mariadb.com/1785291/connectors/java/connector-java-2.7.4/mariadb-java-client-2.7.4.jar [root@localhost ~]# cp -a mariadb-java-client-2.7.4.jar /usr/lib/jvm/java-11-openjdk-11.0.12.0.7-0.el7_9.x86_64/lib/ [root@localhost ~]# cp -a mariadb-java-client-2.7.4.jar /usr/local/tomcat/lib/ |
25. 환경설정 추가 jar 파일 path 등록
|
1 2 3 4 5 6 7 |
[root@localhost ~]# vi /etc/profile export JAVA_HOME=/usr/lib/jvm/java-11-openjdk-11.0.12.0.7-0.el7_9.x86_64 export CATALINA_HOME=/usr/local/tomcat export CLASSPATH=.:$JAVA_HOME/lib/mariadb-java-client-2.7.4.jar:$CATALINA_HOME/lib/mariadb-java-client-2.7.4.jar PATH=$PATH:$JAVA_HOME/bin:$CATALINA_HOME/bin |
26. path 적용
|
1 |
[root@localhost ~]# source /etc/profile |
27. 데이터베이스 테스트 db 생성 및 권한 생성 밑 테이블 입력
|
1 2 3 4 5 6 7 8 9 10 11 12 13 14 15 16 17 18 19 20 |
[root@localhost ~]# mysql -u root -p mysql Enter password: mysql> create database xinet; mysql> grant all on xinet.* to xinet@localhost identified by 'qwer'; mysql> use xinet; mysql> create table idol ( groupname varchar(50), membername varchar(50) ); mysql> create table Users (id int(3) primary key, name varchar(20), email varchar(20), country varchar(20), password varchar(20)); mysql> INSERT INTO Users (id, name, email, country, password) VALUES (1, 'Pankaj', 'pankaj@apple.com', 'India', 'pankaj123'); mysql> INSERT INTO Users (id, name, email, country, password) VALUES (4, 'David', 'david@gmail.com', 'USA', 'david123'); mysql> INSERT INTO Users (id, name, email, country, password) VALUES (4, 'Raman', 'raman@google.com', 'UK', 'raman123'); mysql> INSERT INTO Users (id, name, email, country, password) VALUES (4, 'JSH', 'JSH@XINET.KR', 'KR', 'JSH'); |
28. 기본 홈경로 위에서 설정한 tomcat10.xinet.kr / /home/xinet_test/html /
해당 경로에 dbtest.jsp 파일 생성 ( 소프파일 : https://xinet.kr/data/source/mariadb_test.jsp )
|
1 2 3 4 5 6 7 8 9 10 11 12 13 14 15 16 17 18 19 20 21 22 23 24 25 26 |
[root@localhost /]# vi /home/xinet_test/html/mariadb_test.jsp <%@page import="java.sql.DriverManager"%> <%@page import="java.sql.Connection"%> <%@ page language="java" contentType="text/html; charset=UTF-8" pageEncoding="UTF8"%> <html> <head> <meta http-equiv="Content-Type" content="text/html; charset=UTF-8"> <title>mariadb jdbc connect test</title> </head> <body> <% Connection conn = null; String url = "jdbc:mariadb://localhost:3306/xinet"; String id = "xinet"; //MySQL에 접속을 위한 계정의 ID String pwd = "qwer"; //MySQL에 접속을 위한 계정의 암호 Class.forName("org.mariadb.jdbc.Driver"); conn = DriverManager.getConnection(url, id, pwd); out.println("<h1>MariaDB DB 연결 성공</h1>"); %> </body> </html> |
29. 웹페이지에서 mariadb 연결 페이지 확인

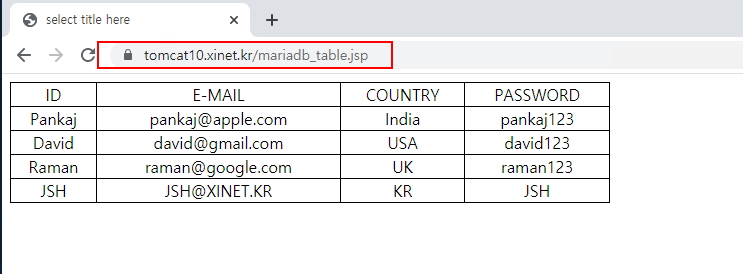
30. 데이터베이스가 연결 성공했으니 위에서 만든 테이블의 내용을 출력해보자 ( 소프파일 : https://xinet.kr/data/source/mariadb_table.jsp )
|
1 2 3 4 5 6 7 8 9 10 11 12 13 14 15 16 17 18 19 20 21 22 23 24 25 26 27 28 29 30 31 32 33 34 35 36 37 38 39 40 41 42 43 44 45 46 47 48 49 50 51 52 53 54 55 56 57 58 59 60 61 62 63 64 |
[root@localhost ~]# vi /home/xinet_test/html/mariadb_table.jsp <%@ page language="java" contentType="text/html; charset=UTF-8" pageEncoding="UTF-8"%> <%@ page import="java.sql.*" %> <!DOCTYPE html> <html> <head> <style> table,th,td { border:1px solid black; border-collapse:collapse; text-align: center; } </style> <meta charset="UTF-8"> <title>select title here</title> </head> <body> <% //mariaDB 준비 Class.forName("org.mariadb.jdbc.Driver"); System.out.println("mariadb 사용가능"); // mariaDB 연결 Connection conn = DriverManager.getConnection("jdbc:mariadb://localhost:3306/xinet","xinet","qwer"); System.out.println(conn + "<-- conn"); // 쿼리 PreparedStatement stmt = conn.prepareStatement("select * from Users"); System.out.println(stmt + "<-- stmt"); // 쿼리 실행 ResultSet rs = stmt.executeQuery(); %> <table style="width:600px"> <tr> <td>ID</td> <td>E-MAIL</td> <td>COUNTRY</td> <td>PASSWORD</td> </tr> <% while(rs.next()){ %> <tr> <td><%=rs.getString("name") %></td> <td><%=rs.getString("email") %></td> <td><%=rs.getString("country") %></td> <td><%=rs.getString("password") %></td> </tr> <% } %> </table> </body> </html> |
