kubernetes의 모니터링을 하는 방법은 여러가지가 있는데 그중에서 가장 많이 사용하는 방법이
prometheus 와 grafana를 이용하는 방법이다
prometheus 는 오픈소스 모니터링 솔루션이고 뛰어난 쿼리 및 시각화를 할수 있는 오픈소스이다
프로메테우스의 주요 기능은 다음과 같습니다.
- 측정항목 이름과 키/값 쌍으로 식별되는 시계열 데이터가 포함된 다차원 데이터 모델
- 이러한 차원성을 활용하는 유연한 쿼리 언어인 PromQL
- 분산 스토리지에 의존하지 않습니다. 단일 서버 노드는 자율적입니다.
- 시계열 수집은 HTTP를 통한 풀 모델을 통해 발생합니다.
- 푸시 시계열은 중간 게이트웨이를 통해 지원됩니다.
- 대상은 서비스 검색 또는 정적 구성을 통해 검색됩니다.
- 다양한 그래프 작성 및 대시보드 지원 모드
주요 내용은 https://prometheus.io/ 해당 페이지에서 확인하자
prometheus 에서는 helm char를 제공하고 시스템 모니터링을 위한 prometheus-grafana 포함되어 있다 별도 grafana 설치할 필요가 없다
O/S : Centos 7.x
kubernetis 버전 : [root@k8smaster ~]# kubectl version
Client Version: v1.28.0
Kustomize Version: v5.0.4-0.20230601165947-6ce0bf390ce3
Server Version: v1.28.0
1. prometheus 를 설치하려면 helm 명령어가 필요하며 설치를 진행한다
|
1 2 3 4 5 6 7 8 9 |
[root@k8smaster ~]# wget https://get.helm.sh/helm-v3.9.4-linux-amd64.tar.gz [root@k8smaster ~]# tar xvfz helm-v3.9.4-linux-amd64.tar.gz linux-amd64/ linux-amd64/helm linux-amd64/LICENSE linux-amd64/README.md [root@k8smaster ~]# mv linux-amd64/helm /usr/bin/ |
2. helm repo 추가
|
1 2 |
[root@k8smaster ~]# helm repo add prometheus-community https://prometheus-community.github.io/helm-charts "prometheus-community" has been added to your repositories |
3. helm repo update
|
1 2 3 4 |
[root@k8smaster ~]# helm repo update Hang tight while we grab the latest from your chart repositories... ...Successfully got an update from the "prometheus-community" chart repository Update Complete. ⎈Happy Helming!⎈ |
4. kube-prometheus-stack 다운로드 ( pull)
|
1 2 3 4 5 |
[root@k8smaster ~]# helm pull prometheus-community/kube-prometheus-stack [root@k8smaster ~]# tar xfz kube-prometheus-stack-48.3.3.tgz [root@k8smaster ~]# cd kube-prometheus-stack/ |
5. 다운로드 받은 폴더로 이동후에 values.yaml 파일을 그대로 사용해도 되지만 패스워드를 미리 수정하자
|
1 2 3 4 |
[root@k8smaster kube-prometheus-stack]# vi values.yaml ### 패스워드 변경 adminPassword: 123!!@@## |
6. monitoring namespace 생성
|
1 2 |
[root@k8smaster kube-prometheus-stack]# kubectl create namespace monitoring namespace/monitoring created |
7. prometheus 설치 ( helm 이용)
|
1 2 3 4 5 6 7 8 9 10 11 |
[root@k8smaster kube-prometheus-stack]# helm install prometheus . -n monitoring -f values.yaml NAME: prometheus LAST DEPLOYED: Wed Aug 23 17:20:44 2023 NAMESPACE: monitoring STATUS: deployed REVISION: 1 NOTES: kube-prometheus-stack has been installed. Check its status by running: kubectl --namespace monitoring get pods -l "release=prometheus" Visit https://github.com/prometheus-operator/kube-prometheus for instructions on how to create & configure Alertmanager and Prometheus instances using the Operator. |
8. 정상적으로 설치가 되고 나서 helm list 로 확인해보면
|
1 2 3 |
[root@k8smaster kube-prometheus-stack]# helm list -n monitoring NAME NAMESPACE REVISION UPDATED STATUS CHART APP VERSION prometheus monitoring 1 2023-08-23 17:20:44.485441718 +0900 KST deployed kube-prometheus-stack-48.3.3 v0.66.0 |
deployed라고 표시가 되면 정상적으로 설치가 되었음
9. kubectl 명령어로 확인
|
1 2 3 4 5 6 7 8 9 10 11 |
[root@k8smaster ~]# kubectl get pod -n monitoring NAME READY STATUS RESTARTS AGE alertmanager-prometheus-kube-prometheus-alertmanager-0 1/2 Running 0 113s prometheus-grafana-5fcd7449d4-hfm4l 2/3 Running 0 2m3s prometheus-kube-prometheus-operator-94cf8986d-dmfb8 1/1 Running 0 2m3s prometheus-kube-state-metrics-7b4488c7c9-j75fg 0/1 Running 3 (17s ago) 2m3s prometheus-prometheus-kube-prometheus-prometheus-0 1/2 Running 0 113s prometheus-prometheus-node-exporter-74flv 1/1 Running 0 2m3s prometheus-prometheus-node-exporter-b4sfz 1/1 Running 0 2m3s prometheus-prometheus-node-exporter-dgrwt 1/1 Running 0 2m3s prometheus-prometheus-node-exporter-vnb2j 1/1 Running 0 2m3s |
10. 서비스 확인
|
1 2 3 4 5 6 7 8 9 10 |
[root@k8smaster ~]# kubectl get svc -n monitoring NAME TYPE CLUSTER-IP EXTERNAL-IP PORT(S) AGE alertmanager-operated ClusterIP None <none> 9093/TCP,9094/TCP,9094/UDP 2m25s prometheus-grafana ClusterIP 10.98.152.57 <none> 80/TCP 2m34s prometheus-kube-prometheus-alertmanager ClusterIP 10.103.232.209 <none> 9093/TCP,8080/TCP 2m34s prometheus-kube-prometheus-operator ClusterIP 10.108.203.236 <none> 443/TCP 2m34s prometheus-kube-prometheus-prometheus ClusterIP 10.100.73.162 <none> 9090/TCP,8080/TCP 2m34s prometheus-kube-state-metrics ClusterIP 10.107.245.175 <none> 8080/TCP 2m34s prometheus-operated ClusterIP None <none> 9090/TCP 2m24s prometheus-prometheus-node-exporter ClusterIP 10.102.191.169 <none> 9100/TCP 2m34s |

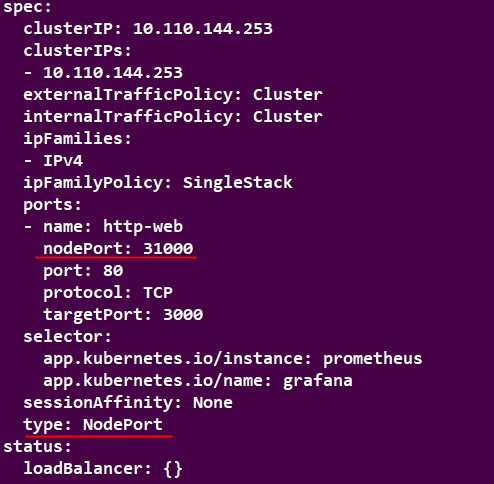
11. 외부에서 접근을 해서 웹브라우저로 확인을 해야 하는데 현재 타입이 ClusterIP이다 이것을 nodePoat로 수정해야 한다 edit 로 수정
|
1 2 3 4 5 6 7 8 9 10 11 12 13 14 |
[root@k8smaster ~]# kubectl edit service -n monitoring prometheus-grafana ### 노드포트 추가 및 타입수정 ports: - name: http-web nodePort: 31000 port: 80 protocol: TCP targetPort: 3000 selector: app.kubernetes.io/instance: prometheus app.kubernetes.io/name: grafana sessionAffinity: None type: NodePort |
prometheus-kube-prometheus-prometheus 해당 서비스도 node 포트로 수정
|
1 2 3 4 5 6 7 8 9 10 11 12 13 14 15 16 17 18 19 |
[root@k8smaster kube-prometheus-stack]# kubectl edit service -n monitoring prometheus-kube-prometheus-prometheus ### 노드포트 추가 및 타입수정 ports: - name: http-web nodePort: 30090 port: 9090 protocol: TCP targetPort: 9090 - name: reloader-web nodePort: 31365 port: 8080 protocol: TCP targetPort: reloader-web selector: app.kubernetes.io/name: prometheus operator.prometheus.io/name: prometheus-kube-prometheus-prometheus sessionAffinity: None type: NodePort |
12. 수정 후 서비스를 확인해보면 node 포트로 변경된것을 확인 할 수 있다

13. 이제 웹페이지를 접속해보자
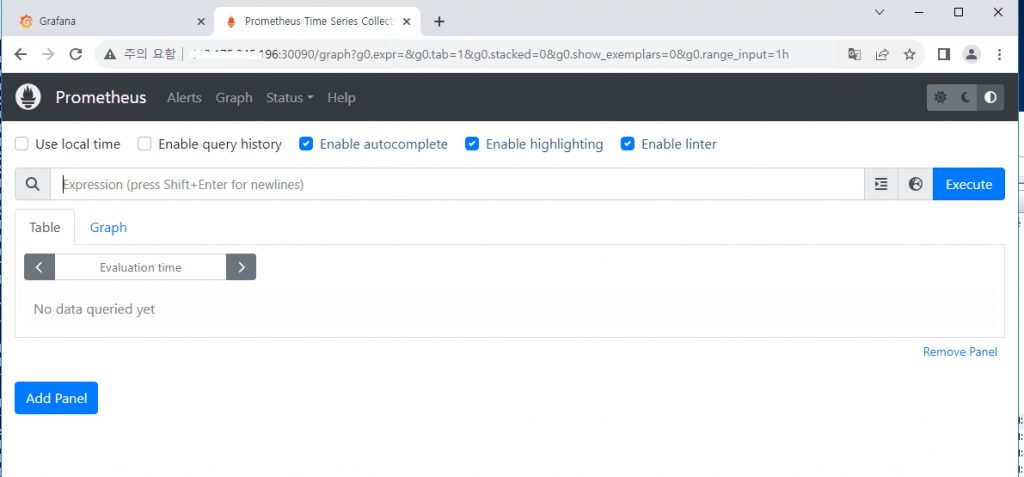 포트번호 30090으로 접속해서 해당 페이지가 출력이 되면 기본 구성 완료
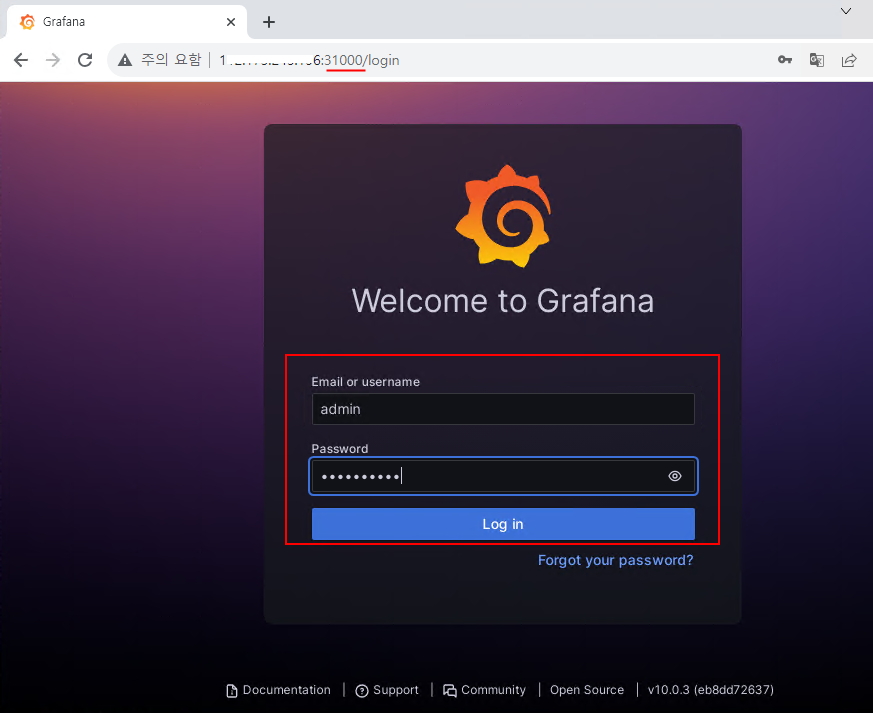
14. 이제 3100 0 포트로 접속을 진행 ID : admin / 패스워드는 위에서 설정한 패스워드 입력
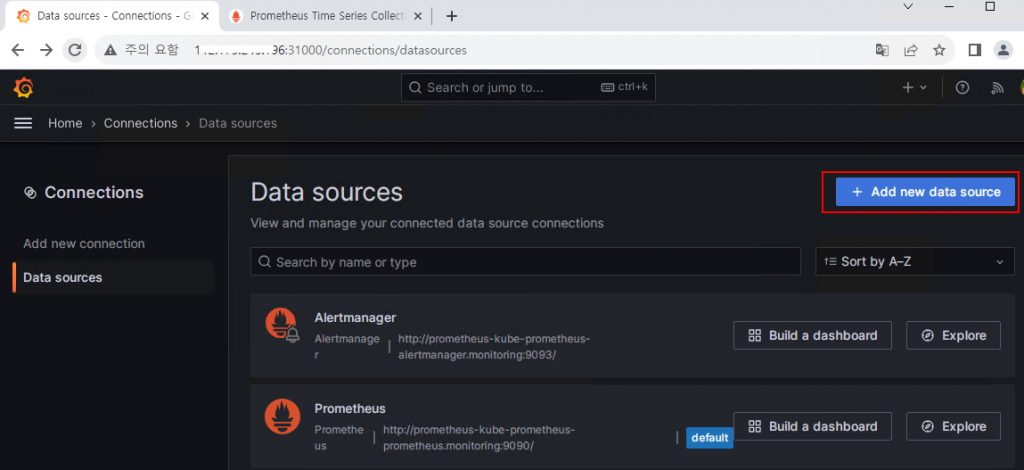
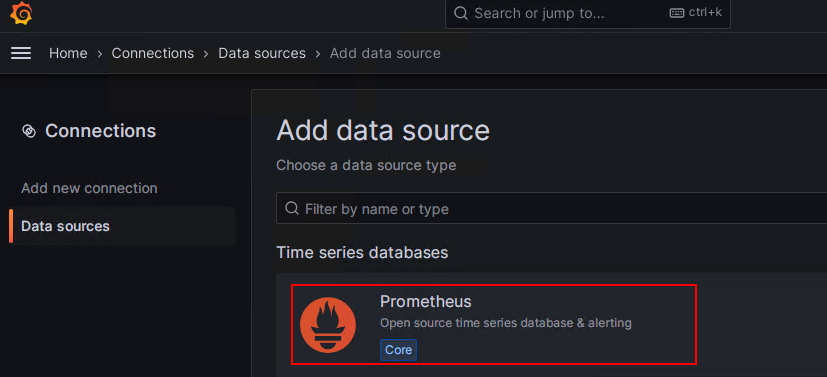
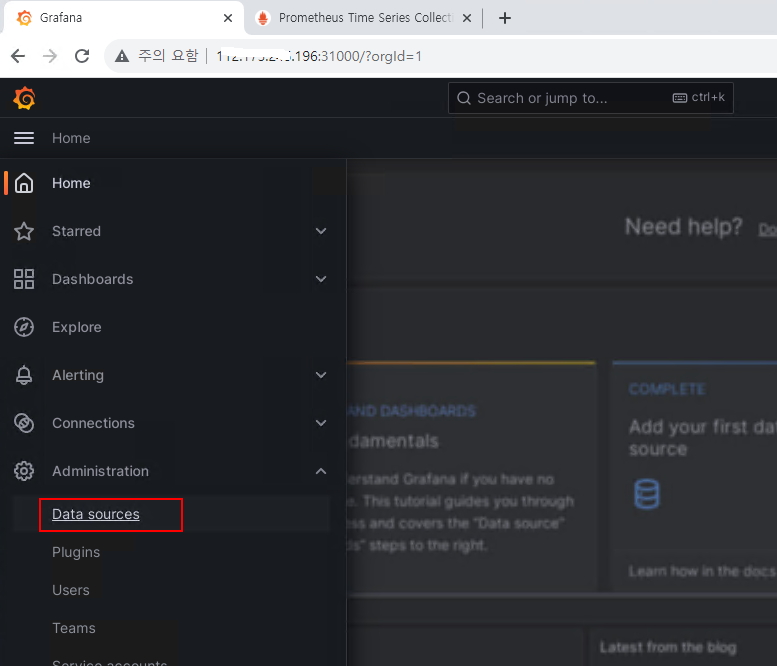
15. 좌측메뉴 administration -> data sources 클릭
18. Prometheus server URL 주소에 30090 노드 아이피 값을 입력
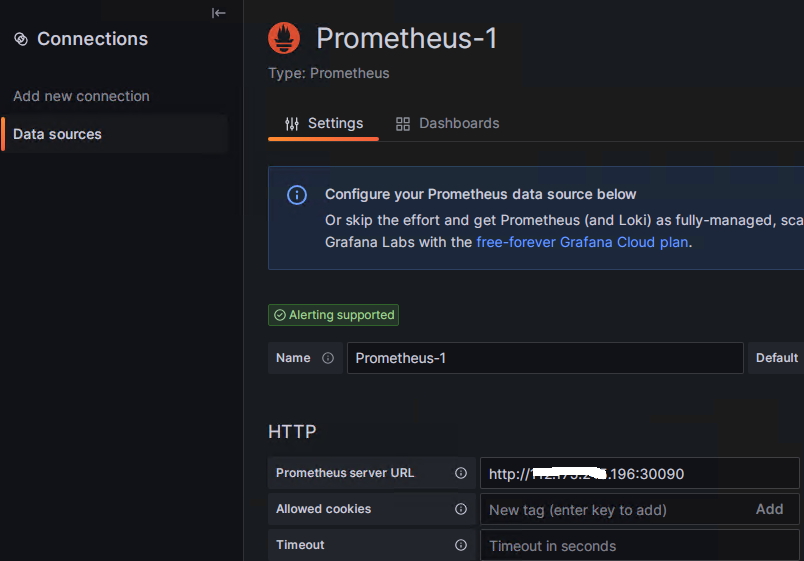
19. 하단 save & test 버튼을 클릭해서 정상적인지 테스트 진행
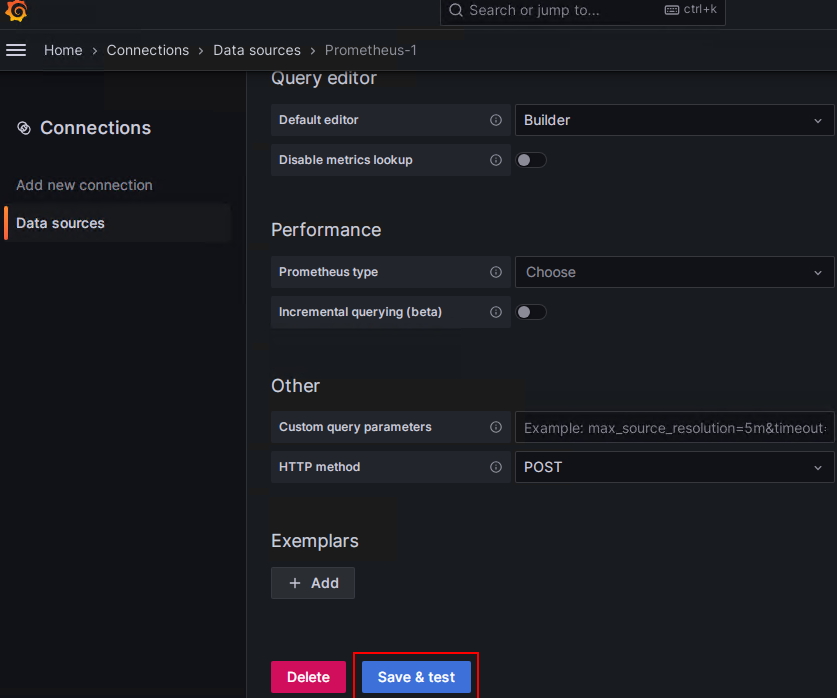
20. succcessfully queried the prometheus api 나오면 성공

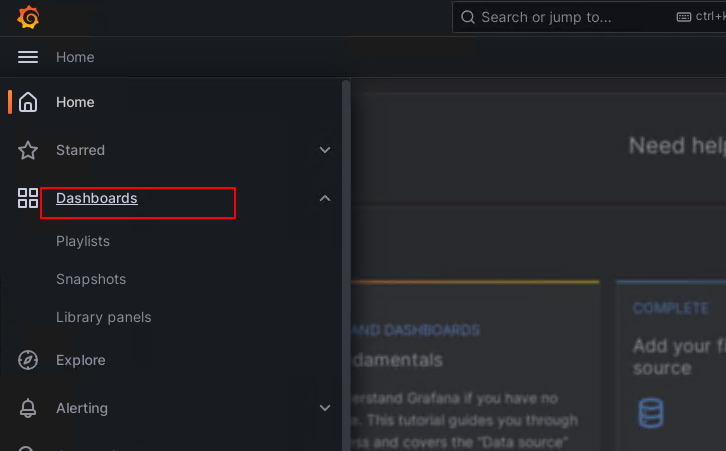
21. 좌측 dashboards 클릭
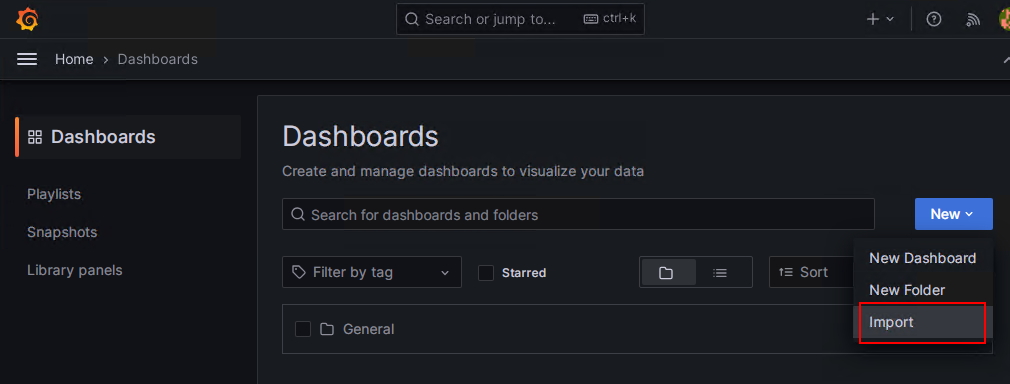
22. new 클릭 후 import 선택
23. 플러그인 여러개를 설치 할 수 있는데 가장 많이 사용하는 플러그인 사용
https://grafana.com/grafana/dashboards/15759-kubernetes-views-nodes/
해당 사이트에 들어가면 json 파일은 다운로드
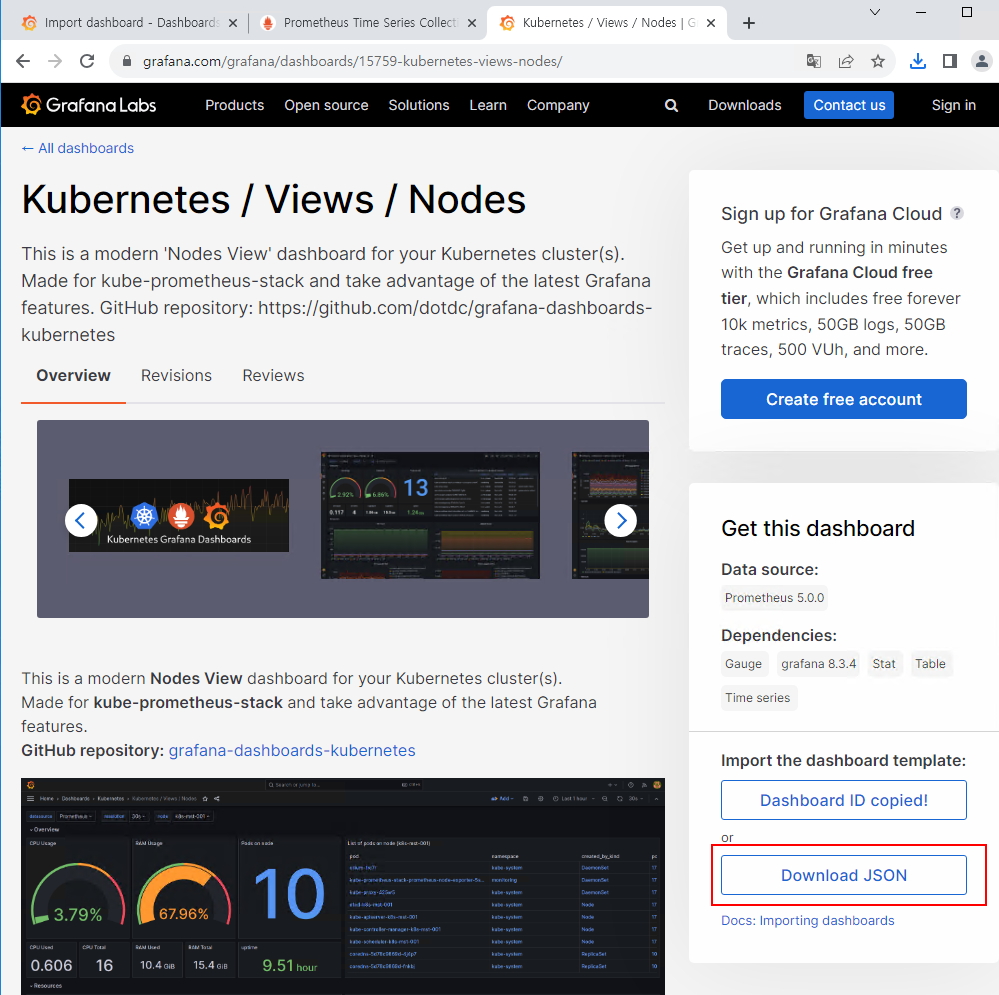
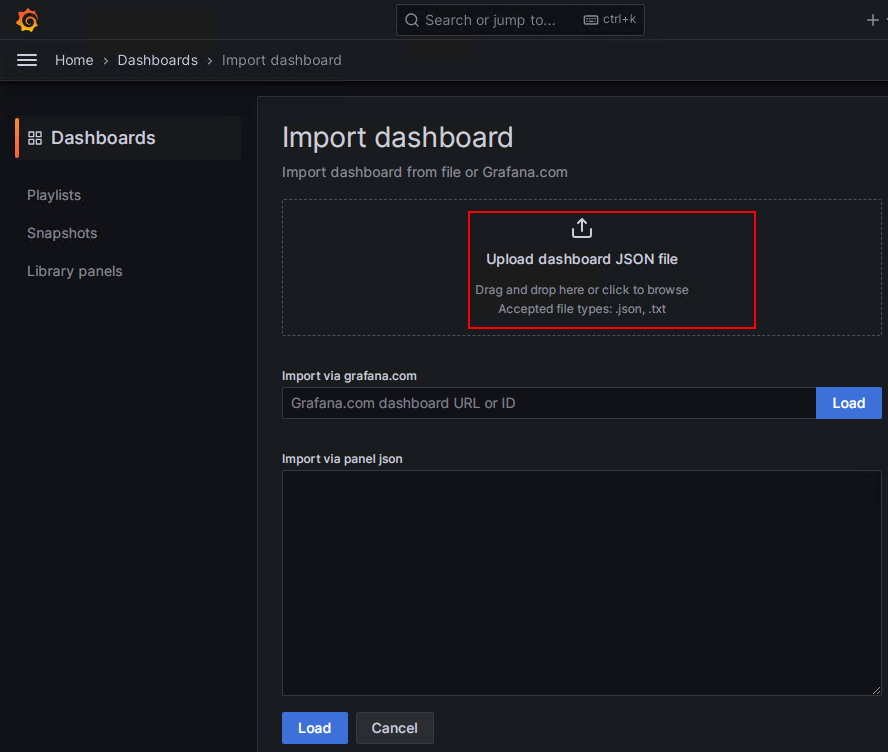
24. 파일받은 json 파일을 업로드
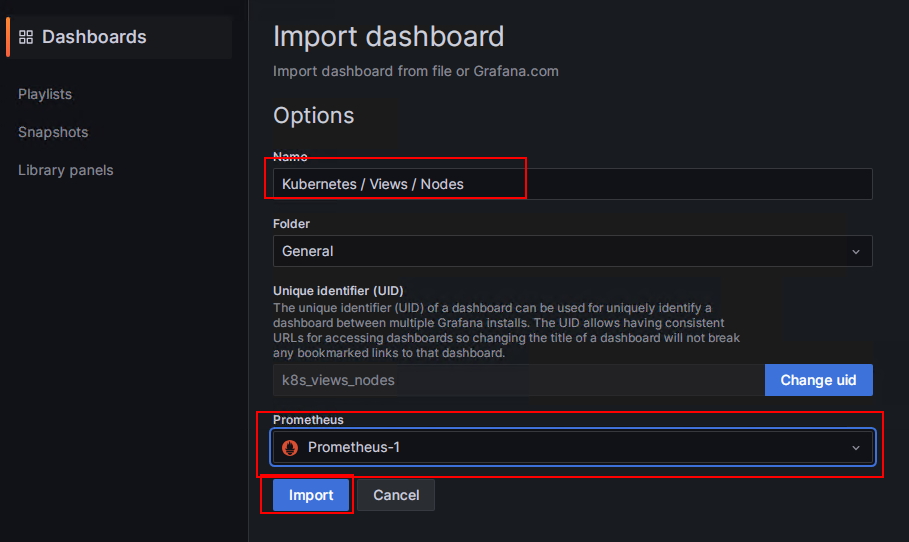
25. 하단 Prometheus 부분에서 위에서 추가한 Prometheus-1 선택 후 import
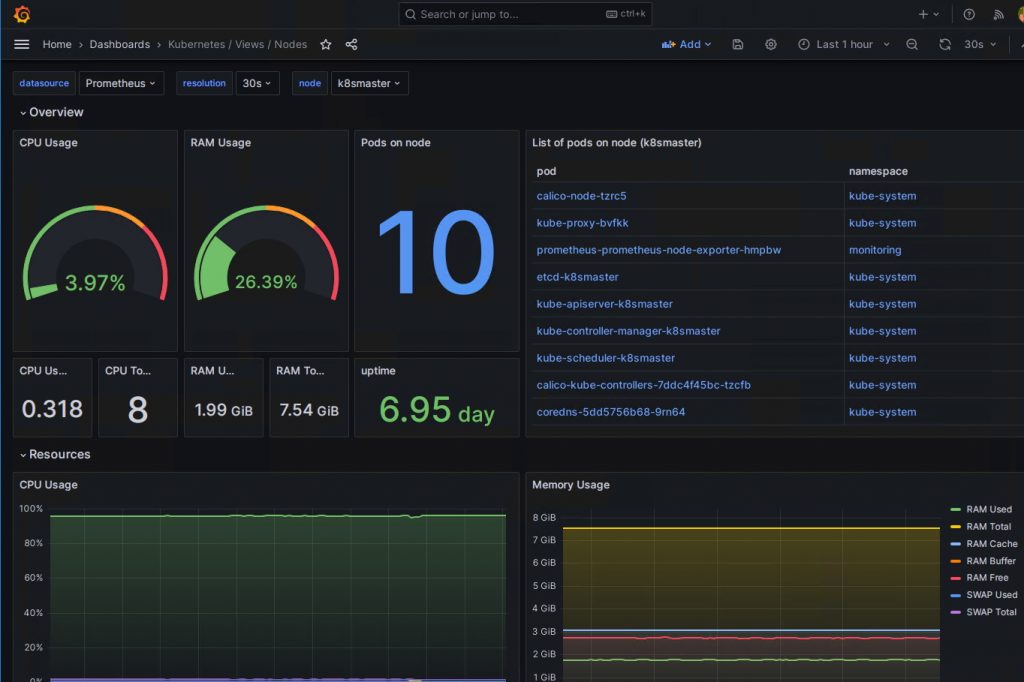
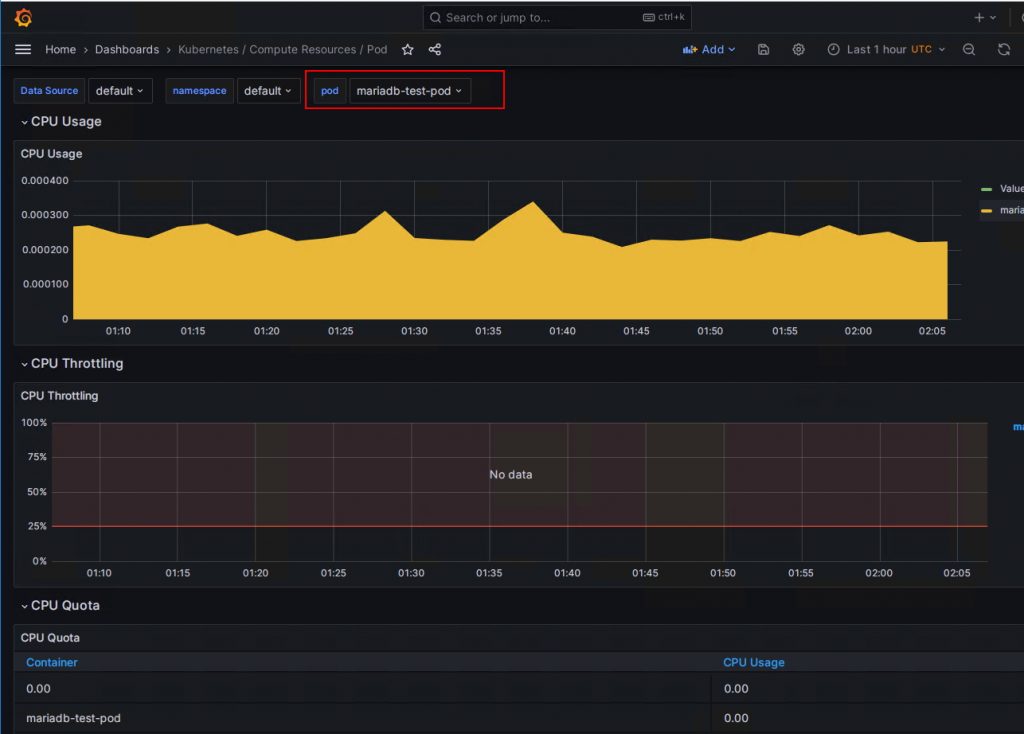
26. 추가 후 대시보드 화면을 보면 아래와 같이 모니터링을 할수 있음
mariadb nod의 사용량 확인 (다양하게 모니터링이 가능)
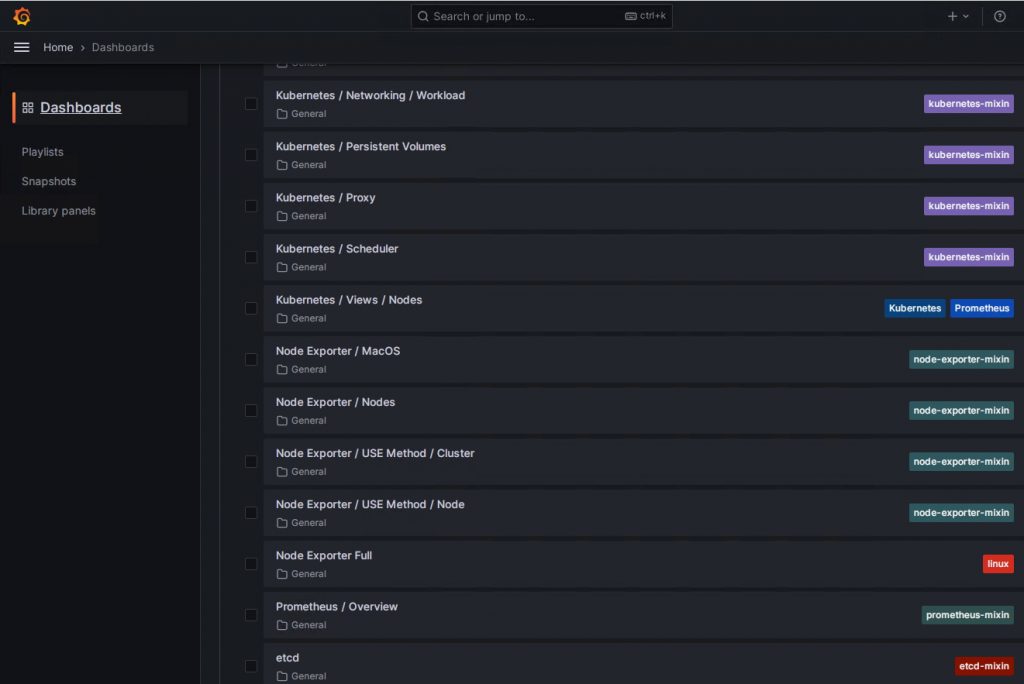
다양한 플러그인을 사용할 수 있다
관련 자료 :
https://prometheus.io/
https://grafana.com/
