O/S : Cetnos 7.x
nginx : 1.21.x
nginx 에서 traffic 사용 현황을 볼때 vts 모듈을 이용해서 볼수 있다
apache로 따지면 cband 라고 볼수 있다
설치 방법 / 우선 nginx 는 설치되어 있다 ( rpm 또는 컴파일 된 환경 모두 동일)
이 환겨에서는 comfile 로 된 환경이다 설치 경로 : /usr/local/nginx
1. 먼저 모듈 파일을 다운로드 한다
|
1 2 3 |
[root@xinet ~]# cd /usr/local/src [root@xinet src]# git clone https://github.com/vozlt/nginx-module-vts.git |
2. nginx 설치 폴더로 이동하거나 설치 폴더를 삭제했으면 해당 버전을 다운로드 후 모듈을 추가 작업 진행한다 ( 현재 해당 버전이 1.21.6 버전인데 설치시 폴더는 삭제해서 새로 받고 진행)
|
1 2 3 4 5 |
[root@xinet src]# tar xvfz nginx-1.21.6.tar.gz [root@xinet src]# cd nginx-1.21.6 [root@xinet nginx-1.21.6]# ./configure --with-compat --add-dynamic-module=/usr/local/src/nginx-module-vts |
3. make module
|
1 |
[root@xinet nginx-1.21.6]# make modules |
4. 모듈이 생성되었으면 파일을 복사 , 복사전에 modules 폴더를 생성 후 복사
|
1 2 3 |
[root@xinet nginx-1.21.6]# mkdir /usr/local/nginx/modules [root@xinet nginx-1.21.6]# cp objs/ngx_http_vhost_traffic_status_module.so /usr/local/nginx/modules/ |
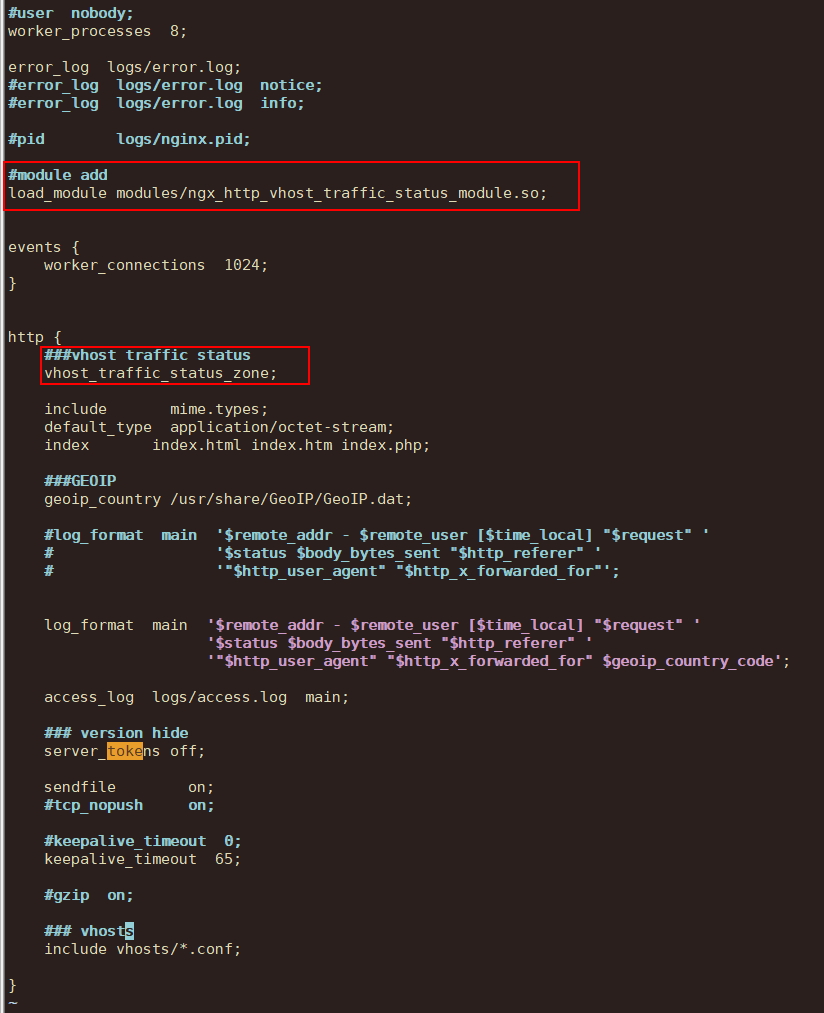
5. nginx.conf 파일을 열어서 모듈을 추가해 주고 전역설정 (http)에도 내용을 추가해준다
|
1 2 3 4 5 6 7 8 9 10 11 12 13 14 15 16 17 18 19 20 21 22 23 24 25 26 27 28 29 30 31 32 33 34 35 36 37 38 39 40 41 42 43 44 45 46 47 48 49 50 51 52 53 54 55 56 57 58 |
[root@xinet nginx-1.21.6]# vi /usr/local/nginx/conf/nginx.conf #user nobody; worker_processes 8; error_log logs/error.log; #error_log logs/error.log notice; #error_log logs/error.log info; #pid logs/nginx.pid; #module add load_module modules/ngx_http_vhost_traffic_status_module.so; events { worker_connections 1024; } http { ### vhost traffic status vhost_traffic_status_zone; include mime.types; default_type application/octet-stream; index index.html index.htm index.php; ###GEOIP geoip_country /usr/share/GeoIP/GeoIP.dat; #log_format main '$remote_addr - $remote_user [$time_local] "$request" ' # '$status $body_bytes_sent "$http_referer" ' # '"$http_user_agent" "$http_x_forwarded_for"'; log_format main '$remote_addr - $remote_user [$time_local] "$request" ' '$status $body_bytes_sent "$http_referer" ' '"$http_user_agent" "$http_x_forwarded_for" $geoip_country_code'; access_log logs/access.log main; ### version hide server_tokens off; sendfile on; #tcp_nopush on; #keepalive_timeout 0; keepalive_timeout 65; #gzip on; include vhosts/*.conf; } |

6. 이제 가상호스트 2곳에 트래픽을 체크할 수 있게 vhost http 부분에 내용을 추가해준다
여기서는 2개의 사이트가 존재한다 / xinet.kr / huboxxxxxxx.com
첫번째 xinet.kr vhost conf 파일 수정 server { } 내용 부분에 추가 / 아무나 접근을 못하게 httpd 인증을 구성
|
1 2 3 4 5 6 7 8 9 10 11 12 13 14 15 |
[root@xinet nginx-1.21.6]# vi /usr/local/nginx/conf/vhosts/xinet.kr.conf server { location /traffic_status { auth_basic "Restricted"; auth_basic_user_file /usr/local/nginx/.htpasswd; vhost_traffic_status_display; vhost_traffic_status_display_format html; } } |
두번째 vhost.conf 파일 내용 추가
|
1 2 3 4 5 6 7 8 9 |
[root@xinet nginx-1.21.6]# vi /usr/local/nginx/conf/vhosts/huboxxxxxx.com.conf http { vhost_traffic_status_display; vhost_traffic_status_display_format html; } |
인증을 위해서 htpasswd 사용
|
1 2 3 4 |
[root@xinet vhosts]# htpasswd -c /usr/local/nginx/.htpasswd admin New password: Re-type new password: Adding password for user admin |
nginx 환경설정 이상유무 확인
|
1 2 3 |
[root@xinet nginx-1.21.6]# nginx -t nginx: the configuration file /usr/local/nginx/conf/nginx.conf syntax is ok nginx: configuration file /usr/local/nginx/conf/nginx.conf test is successful |
nginx 재시작
|
1 |
[root@xinet nginx-1.21.6]# systemctl restart nginx |
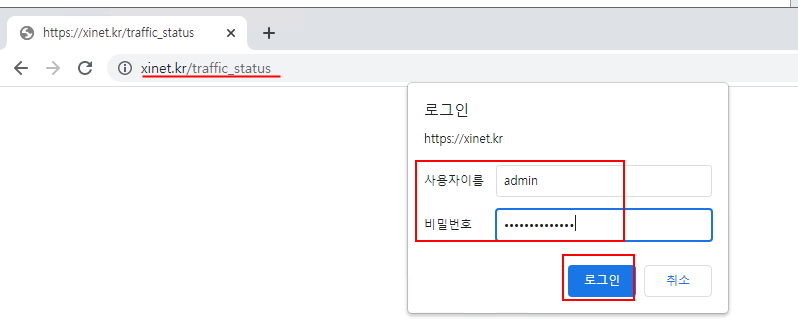
웹페이지 확인 / 위에서 생성한 admin의 입력한 패스워드 입력 후 로그인

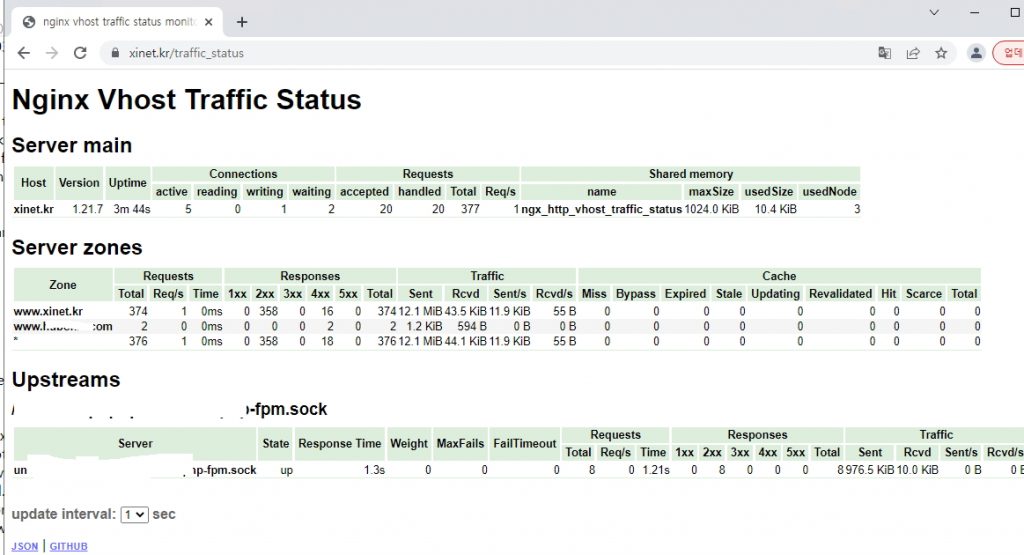
로그인을 하게되면 아래와 같이 사이트별 트래픽 현황을 확인 할수 있다
만약 해당 사이트의 트래픽을 500M로 제한하고 싶다면
해당 부분에 추가
|
1 2 |
vhost_traffic_status_limit_traffic in:500M; vhost_traffic_status_limit_traffic out:500M; |
### nginx quic 설치했을 경우
|
1 2 3 4 5 6 7 8 9 10 |
[root@xinet src]# cd nginx-quic-c2f5d79cde64 [root@xinet nginx-quic-c2f5d79cde64]# ./auto/configure --with-compat --add-dynamic-module=/usr/local/src/nginx-module-vts [root@xinet nginx-quic-c2f5d79cde64]# make modules [root@xinet nginx-quic-c2f5d79cde64]# mkdir /usr/local/nginx/modules [root@xinet nginx-quic-c2f5d79cde64]# cp objs/ngx_http_vhost_traffic_status_module.so /usr/local/nginx/modules/ |
